
wsdjeg/chat.nvim
 github
 25
25
 1
1
 1
1
 1
1
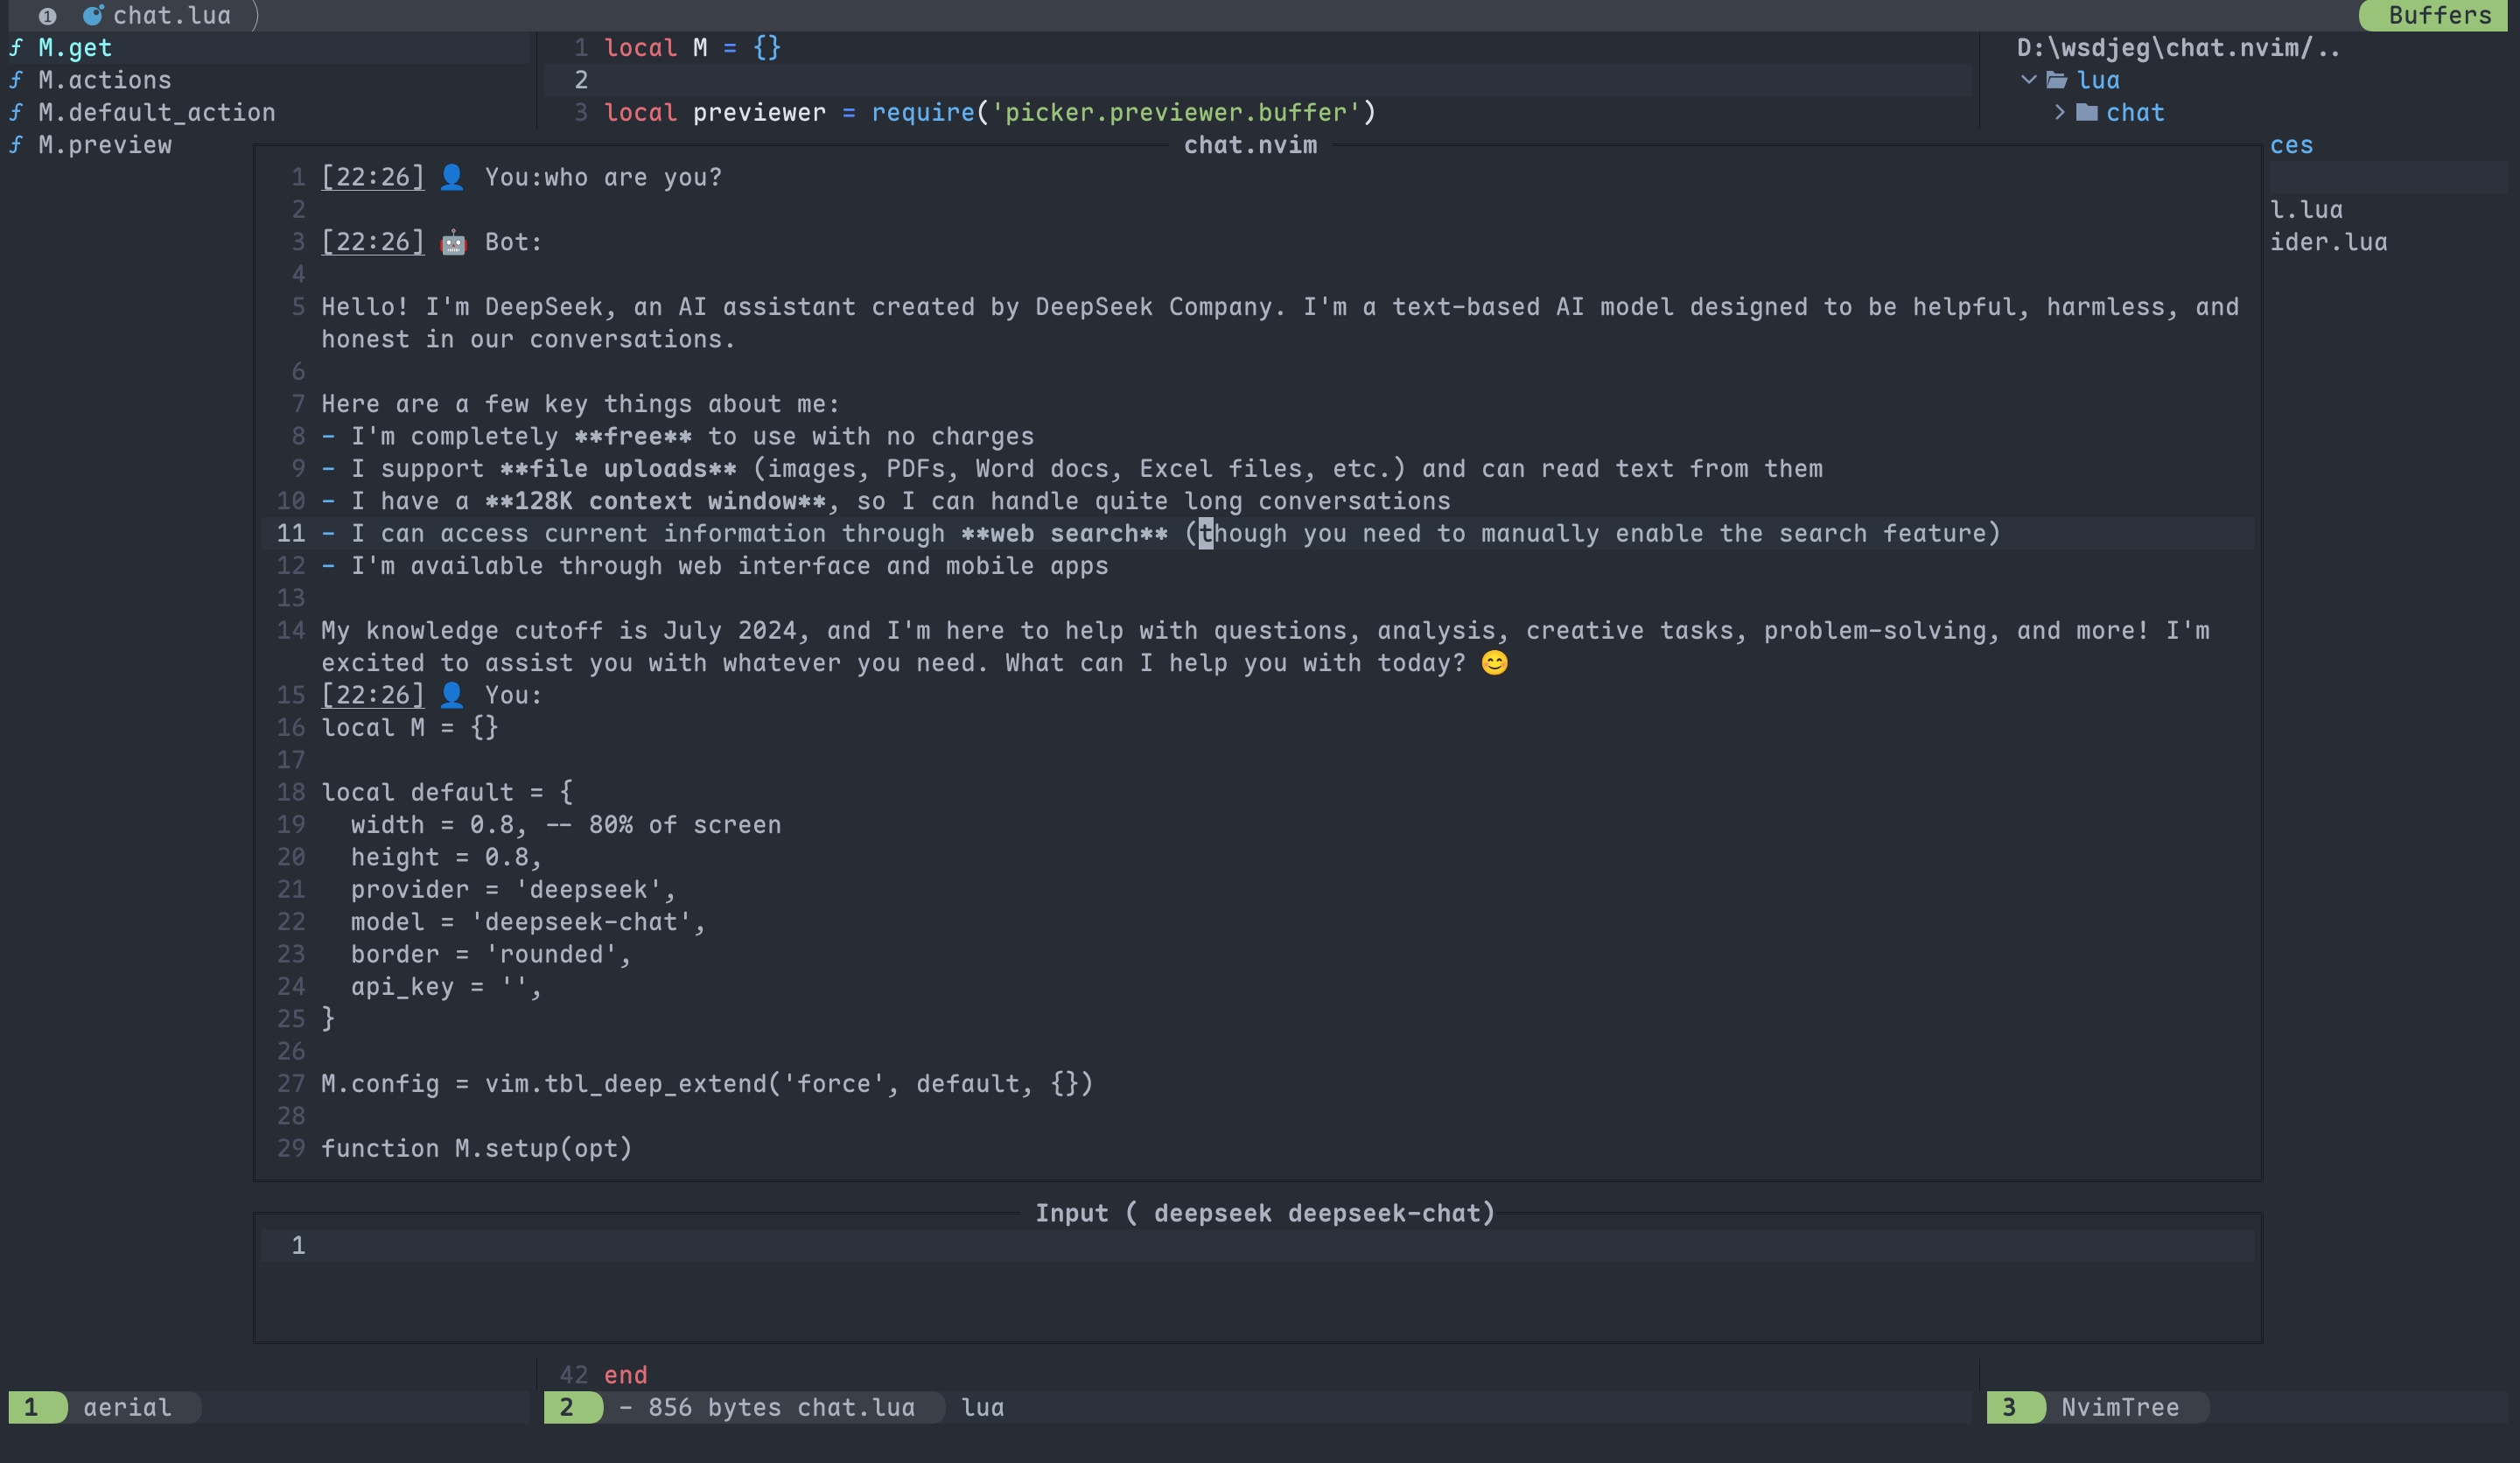
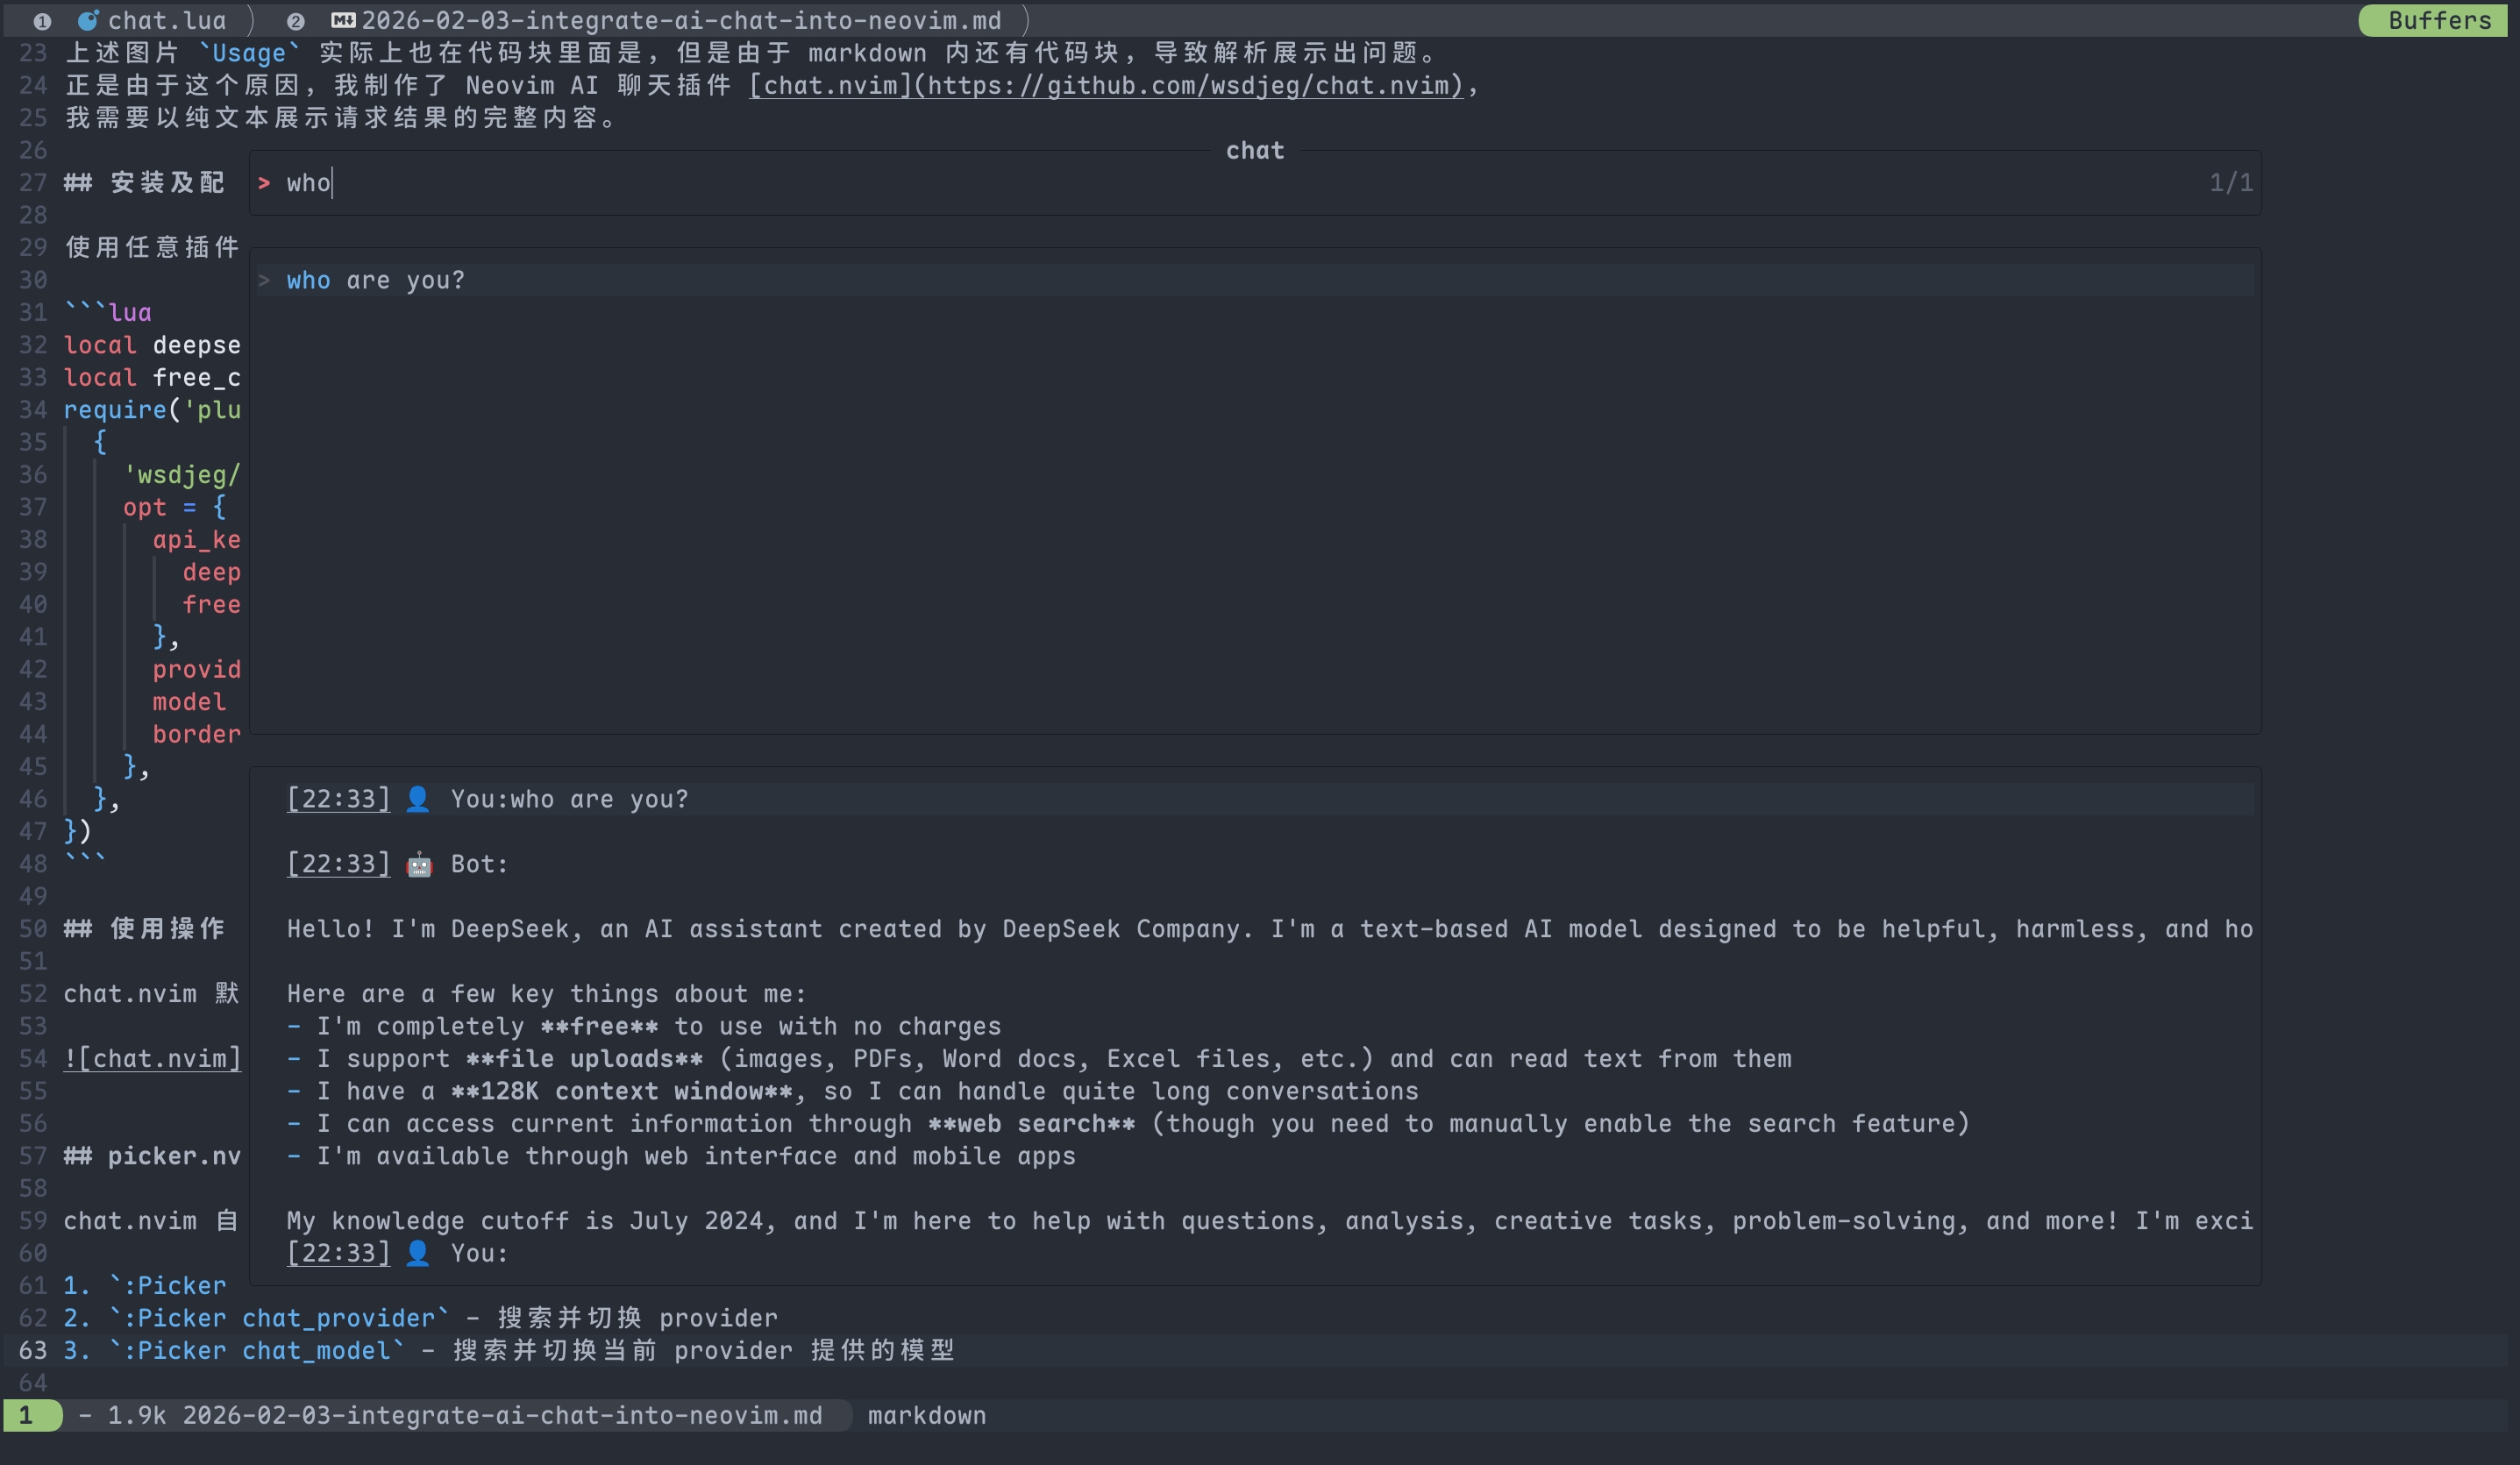
chat.nvim
A lightweight, extensible chat plugin for Neovim with AI integration. Chat with AI assistants directly in your editor using a clean, floating window interface.
![]()


- ✨ Features
- 📦 Installation
- 🔧 Configuration
- ⚙️ Usage
- 🤖 Providers
- 🛠️ Tools
- 🌐 HTTP API
- 🔍 Picker Integration
- 💬 IM Integration
- 📣 Self-Promotion
- 💬 Feedback
- 📄 License
✨ Features
- Three-Tier Memory System: Working memory (session tasks), daily memory (short-term goals), and long-term memory (permanent knowledge) with automatic extraction and priority-based retrieval
- Parallel Sessions: Run multiple independent conversations with different AI models, each maintaining separate context and settings
- Multiple AI Providers: Built-in support for DeepSeek, GitHub AI, Moonshot, OpenRouter, Qwen, SiliconFlow, Tencent, BigModel, Volcengine, OpenAI, LongCat, Anthropic Claude, Google Gemini, Ollama, and custom providers
- Tool Call Integration: Built-in tools for file operations (
@read_file,@find_files,@search_text), version control (@git_diff,@git_log,@git_status,@git_show), conversation history (@get_history), memory management... - Zettelkasten Integration: Note-taking support via
@zettelkasten_createand@zettelkasten_gettools for knowledge management (requires zettelkasten.nvim) - IM Integration: Connect Discord, Lark (Feishu), DingTalk, WeCom (Enterprise WeChat), and Telegram channels to chat.nvim sessions for remote AI interaction
- HTTP API Server: Built-in HTTP server for receiving external messages with API key authentication and message queue support
- Session Management: Commands for creating (
:Chat new), navigating (:Chat prev/next), clearing (:Chat clear), deleting (:Chat delete), saving (:Chat save), loading (:Chat load), sharing (:Chat share), bridging (:Chat bridge), previewing (:Chat preview), and changing working directory (:Chat cd) - Picker Integration: Seamless integration with picker.nvim for browsing chat history (
picker-chat), switching providers (chat_provider), and selecting models (chat_model) - Floating Window Interface: Clean, non-intrusive dual-window layout with configurable dimensions and borders
- Streaming Responses: Real-time AI responses with cancellation support (
Ctrl-C) and retry mechanism (r) - Token Usage Tracking: Display real-time token consumption for each response
- Lightweight Implementation: Pure Lua with minimal dependencies and comprehensive error handling
- Customizable Configuration: Flexible setup for API keys, allowed paths, memory settings, and system prompts
- Session HTML Preview: Generate and open HTML previews of chat sessions in your browser via
:Chat previewcommand or<C-o>in picker - Custom Tools: Support for creating custom tools via
lua/chat/tools/<tool_name>.luawith automatic discovery - Custom Providers: Support for creating custom AI providers with custom protocols
- Custom Protocols: Support for custom API response parsing (OpenAI, Anthropic, Gemini, and extensible)
- Context Window Truncation: Automatic context management with configurable trigger threshold and recent message preservation to prevent token limit issues
- Token Usage Tracking: Display real-time token consumption including cached tokens for each response
- Customizable Highlights: Configure title text and badge highlight groups to match your colorscheme
- Title Icons: Visual session indicators with customizable icons for different session states
- MCP (Model Context Protocol) Support: Native integration with MCP servers for extended tool capabilities. Automatically discover and call MCP tools alongside built-in tools with seamless protocol handling and async execution
📦 Installation
Prerequisites
System Dependencies (optional but recommended for full functionality):
ripgrep(rg): Required for the@search_texttoolcurl: Required for the@fetch_webtoolgit: Required for the@git_difftoolInstall with your package manager:
# Ubuntu/Debian
sudo apt install ripgrep curl git

# macOS
brew install ripgrep curl git

# Arch Linux
sudo pacman -S ripgrep curl git
Neovim Plugin Dependencies:
job.nvim: Required dependency for asynchronous operationspicker.nvim: Recommended for enhanced session and provider management
Package Manager Installation
Using nvim-plug
require('plug').add({
  {
    'wsdjeg/chat.nvim',
    depends = {
      {
        'wsdjeg/job.nvim', -- Required
        'wsdjeg/picker.nvim', -- Optional but recommended
      },
    },
  },
})
Using lazy.nvim
{
  'wsdjeg/chat.nvim',
  dependencies = {
    'wsdjeg/job.nvim', -- Required
    'wsdjeg/picker.nvim', -- Optional but recommended
  },
}
Using packer.nvim
use({
  'wsdjeg/chat.nvim',
  requires = {
    'wsdjeg/job.nvim', -- Required
    'wsdjeg/picker.nvim', -- Optional but recommended
  },
})
Manual Installation
If you're not using a package manager:
Clone the repositories:
git clone https://github.com/wsdjeg/chat.nvim ~/.local/share/nvim/site/pack/chat/start/chat.nvim
git clone https://github.com/wsdjeg/job.nvim ~/.local/share/nvim/site/pack/chat/start/job.nvim
Add to your Neovim configuration (
~/.config/nvim/init.luaor~/.config/nvim/init.vim):vim.cmd[[packadd job.nvim]] vim.cmd[[packadd chat.nvim]] require('chat').setup({ -- Your configuration here })
Post-Installation Setup
- API Keys: Configure at least one AI provider API key in the
api_keytable - File Access: Set
allowed_pathto control which directories tools can access - Memory System: Configure memory settings based on your needs
- HTTP Server (optional): Configure HTTP server settings if you want to enable external message integration
Quick Start
After installation, you can immediately start using chat.nvim:
:Chat          " Open chat window
:Chat new      " Start a new session
:Chat prev     " Switch to previous session
:Chat next     " Switch to next session
For detailed usage instructions, see the Usage section.
🔧 Configuration
chat.nvim provides flexible configuration options through the require('chat').setup() function. All configurations have sensible defaults.
Basic Options
| Option | Type | Default | Description |
|---|---|---|---|
width |
number | 0.8 |
Chat window width (percentage of screen width, 0.0-1.0) |
height |
number | 0.8 |
Chat window height (percentage of screen height, 0.0-1.0) |
auto_scroll |
boolean | true |
Controls automatic scrolling behavior of the result window |
border |
string | 'rounded' |
Window border style, supports all Neovim border options |
provider |
string | 'deepseek' |
Default AI provider |
model |
string | 'deepseek-chat' |
Default AI model |
strftime |
string | '%m-%d %H:%M:%S' |
Time display format |
system_prompt |
string or function | '' |
Default system prompt, can be a string or a function that returns a string |
highlights |
table | {title = 'ChatNvimTitle', title_badge = 'ChatNvimTitleBadge'} |
Highlight groups for title text and decorative badges |
HTTP Server Configuration
Configure the built-in HTTP server for receiving external messages:
| Option | Type | Default | Description |
|---|---|---|---|
http.host |
string | '127.0.0.1' |
Host address for the HTTP server |
http.port |
number | 7777 |
Port number for the HTTP server |
http.api_key |
string | 'test_chat_nvim' |
API key for authenticating incoming requests (must be set to enable server) |
Example configuration:
http = {
  host = '127.0.0.1',
  port = 7777,
  api_key = 'your-secret-api-key-here', -- Set to empty string to disable HTTP server
}
Notes:
- The HTTP server is automatically started when
http.api_keyis not empty - Incoming requests must include the API key in the
X-API-Keyheader - Messages are queued and processed when the chat window is not busy
API Key Configuration
Configure API keys for the AI providers you plan to use:
api_key = {
  deepseek = 'sk-xxxxxxxxxxxx',        -- DeepSeek AI
  github = 'github_pat_xxxxxxxx',      -- GitHub AI
  moonshot = 'sk-xxxxxxxxxxxx',        -- Moonshot AI
  openrouter = 'sk-or-xxxxxxxx',       -- OpenRouter
  qwen = 'qwen-xxxxxxxx',              -- Alibaba Qwen
  siliconflow = 'xxxxxxxx-xxxx-xxxx',  -- SiliconFlow
  tencent = 'xxxxxxxx-xxxx-xxxx',      -- Tencent Hunyuan
  bigmodel = 'xxxxxxxx-xxxx-xxxx',     -- BigModel AI
  volcengine = 'xxxxxxxx-xxxx-xxxx',   -- Volcengine AI
  openai = 'sk-xxxxxxxxxxxx',          -- OpenAI
  longcat = 'lc-xxxxxxxxxxxx',         -- LongCat AI
  cherryin = 'sk-xxxxxxxxxxxx',        -- CherryIN AI
}
Only configure keys for providers you plan to use; others can be omitted.
File Access Control
Control which file paths tools can access for security:
-- Option 1: Disable all file access (default)
allowed_path = ''

-- Option 2: Allow a single directory
allowed_path = '/home/user/projects'

-- Option 3: Allow multiple directories
allowed_path = {
  vim.fn.getcwd(),               -- Current working directory
  vim.fn.expand('~/.config/nvim'), -- Neovim config directory
  '/etc',                        -- System configuration files
}
Context Window Configuration
Configure automatic context truncation to manage token usage:
context = {
  enable = true,           -- Enable/disable context truncation
  trigger_threshold = 50,  -- Number of messages to trigger truncation
  keep_recent = 10,        -- Keep recent N messages (not included in truncation search)
}
Notes:
- When conversation exceeds
trigger_thresholdmessages, older messages may be summarized or removed - The
keep_recentparameter ensures recent context is preserved - Helps prevent token limit errors during long conversations
Memory System Configuration
chat.nvim implements a sophisticated three-tier memory system inspired by cognitive psychology:
Memory Architecture:
- Working Memory ⚡ - High-priority, session-scoped memory for current tasks and decisions
- Daily Memory 📅 - Temporary memory for daily tasks and short-term goals (auto-expires)
- Long-term Memory 💾 - Permanent knowledge storage for facts, preferences, and skills
Configuration:
memory = {
  enable = true,  -- Global memory system switch

  -- Long-term memory: Permanent knowledge (never expires)
  long_term = {
    enable = true,
    max_memories = 500,           -- Maximum memories to store
    retrieval_limit = 3,          -- Maximum memories to retrieve per query
    similarity_threshold = 0.3,   -- Text similarity threshold (0-1)
  },

  -- Daily memory: Temporary tasks and goals (auto-expires)
  daily = {
    enable = true,
    retention_days = 7,           -- Days before auto-deletion
    max_memories = 100,           -- Maximum daily memories
    similarity_threshold = 0.3,
  },

  -- Working memory: Current session focus (highest priority)
  working = {
    enable = true,
    max_memories = 20,            -- Maximum working memories per session
    priority_weight = 2.0,        -- Priority multiplier (higher = more important)
  },

  -- Storage location
  storage_dir = vim.fn.stdpath('cache') .. '/chat.nvim/memory/',
}
Memory Type Characteristics:
| Type | Lifetime | Priority | Use Case |
|---|---|---|---|
| Working | Session only | Highest | Current tasks, decisions, active context |
| Daily | 7-30 days | Medium | Short-term goals, today's tasks, reminders |
| Long-term | Permanent | Normal | Facts, preferences, skills, knowledge |
Auto-Detection:
The @extract_memory tool automatically detects memory type based on keywords:
- Working Memory: "当前/正在/current", "任务/task", "决策/decision"
- Daily Memory: "今天/明天/today/tomorrow", "待办/todo", "临时/temporary"
- Long-term Memory: Other persistent information
Example Usage:
-- Minimal configuration (use defaults)
memory = {
  enable = true,
}

-- Disable specific memory types
memory = {
  enable = true,
  working = { enable = false },
  daily = { enable = false },
}

-- Adjust retention and capacity
memory = {
  enable = true,
  long_term = {
    max_memories = 1000,
    retrieval_limit = 5,
  },
  daily = {
    retention_days = 14,
    max_memories = 200,
  },
  working = {
    max_memories = 30,
    priority_weight = 3.0,
  },
}
Notes:
- Working memory is cleared when the session ends
- Daily memories are automatically cleaned up after
retention_days - Long-term memories persist until manually deleted or limit is reached
- Priority affects retrieval order: working > daily > long-term
- All memory types support categories: fact, preference, skill, event
system_prompt Usage Examples
Here are different ways to use the system_prompt option:
String (simple):
system_prompt = 'You are a helpful programming assistant.',
Function loading from file:
system_prompt = function()
  local path = vim.fn.expand('~/.config/nvim/AGENTS.md')
  if vim.fn.filereadable(path) == 1 then
    return table.concat(vim.fn.readfile(path), '\n')
  end
  return 'Default system prompt'
end
Function with project-specific prompts:
system_prompt = function()
  local cwd = vim.fn.getcwd()
  if string.find(cwd, 'chat%.nvim') then
    return 'You are a specialized assistant for chat.nvim plugin development.'
  elseif string.find(cwd, 'picker%.nvim') then
    return 'You are a specialized assistant for picker.nvim plugin development.'
  end
  return 'You are a general programming assistant.'
end
Function with time-based prompts:
system_prompt = function()
  local hour = tonumber(os.date("%H"))
  local day = os.date("%A")
  return string.format('Good %s! Today is %s. I am your AI assistant.',
    hour < 12 and 'morning' or hour < 18 and 'afternoon' or 'evening',
    day)
end
MCP Server Configuration
chat.nvim supports Model Context Protocol (MCP) servers for extended tool capabilities. MCP allows you to connect external tool servers that provide additional functionality.
Supported Transports:
- stdio: Standard input/output transport (default for command-based servers)
- streamable_http: HTTP transport with SSE support (for HTTP-based servers)
Basic Configuration (stdio transport):
mcp = {
  -- Example: Web search MCP server using stdio transport
  open_webSearch = {
    command = 'npx',
    args = { '-y', 'open-websearch@latest' },
    disabled = false,  -- Set to true to disable this server
  },

  -- Example: Another stdio MCP server
  my_custom_server = {
    command = '/path/to/mcp-server',
    args = { '--config', '/path/to/config.json' },
  },
}
HTTP Transport Configuration:
For HTTP-based MCP servers, use the streamable_http transport:
mcp = {
  -- HTTP-based MCP server
  my_http_server = {
    url = 'https://mcp-server.example.com',
    headers = {
      ['Authorization'] = 'Bearer YOUR_TOKEN',
    },
  },

  -- HTTP server with command to start
  my_managed_http_server = {
    command = 'my-mcp-http-server',
    args = { '--port', '8080' },
    url = 'http://localhost:8080',
    transport = {
      type = 'streamable_http',
      url = 'http://localhost:8080',
    },
  },
}
Transport Configuration Parameters:
| Parameter | Type | Required | Description |
|---|---|---|---|
command |
string | ❌ No* | Path to MCP server executable (required for stdio) |
args |
array | ❌ No | Command-line arguments for the server |
url |
string | ❌ No* | HTTP URL for streamable_http transport |
headers |
table | ❌ No | HTTP headers (key-value pairs) |
transport |
table | ❌ No | Explicit transport configuration |
transport.type |
string | ❌ No | Transport type: "stdio" or "streamable_http" |
transport.url |
string | ❌ No | Override URL for transport |
transport.headers |
table | ❌ No | Override headers for transport |
disabled |
boolean | ❌ No | Set to true to disable this server (default: false) |
*Either command (for stdio) or url (for HTTP) is required.
MCP Tool Naming:
MCP tools are automatically prefixed with mcp_<server>_<tool> format:
- Original MCP tool:
search - MCP server name:
open_webSearch - Final tool name:
mcp_open_webSearch_search
Usage in Chat:
@mcp_open_webSearch_search query="neovim plugins" limit=10
Key Features:
- Multiple Transports: Support for stdio and HTTP transports
- Automatic Discovery: MCP tools are automatically discovered and integrated
- Seamless Integration: MCP tools work alongside built-in tools
- Async Execution: All MCP tool calls are non-blocking
- Protocol Compliance: Full JSON-RPC 2.0 protocol support
- Error Handling: Graceful error handling and timeout protection
- Auto Management: Servers are automatically started when opening chat and stopped on exit
Complete Example:
require('chat').setup({
  -- ... other configuration

  -- MCP servers configuration
  mcp = {
    -- Stdio-based MCP server
    open_webSearch = {
      command = 'npx',
      args = { '-y', 'open-websearch@latest' },
    },

    -- HTTP-based MCP server
    remote_tools = {
      url = 'https://mcp-api.example.com',
      headers = {
        ['Authorization'] = 'Bearer YOUR_API_KEY',
      },
    },

    -- Managed HTTP server (starts local process)
    local_http_server = {
      command = 'my-mcp-server',
      args = { '--port', '3000' },
      transport = {
        type = 'streamable_http',
        url = 'http://localhost:3000',
      },
    },

    -- Disabled server (won't start)
    experimental = {
      command = 'mcp-experimental',
      disabled = true,
    },
  },
})
Transport Detection:
chat.nvim automatically detects the transport type:
- If
transport.typeis specified, use that transport - If
commandexists withouttransport, use stdio transport - If
urlexists withoutcommand, use streamable_http transport
Notes:
- MCP servers are started automatically when opening the chat window
- Server connections are managed automatically (cleanup on exit)
- Tools are discovered during initialization with a small delay for protocol handshake
- All MCP tool calls follow the same pattern as built-in tools
- Check server logs with
:messagesfor connection issues - Use
:Chat mcpcommands for manual server management
Troubleshooting:
- Server not starting: Verify the
commandpath is correct and executable - Tools not appearing: Wait a few seconds for the initialization handshake
- Tool call failures: Check server logs for error messages
- Connection issues: Ensure the MCP server is properly configured
- HTTP transport issues: Check that the URL is accessible and headers are correct
For more information about MCP, see the Model Context Protocol specification.
IM Integration Configuration
Configure instant messaging platform integrations for remote AI interaction:
integrations = {
  -- Discord
  discord = {
    token = 'YOUR_DISCORD_BOT_TOKEN',     -- Discord bot token
    channel_id = 'YOUR_CHANNEL_ID',        -- Discord channel ID
  },

  -- Lark (Feishu)
  lark = {
    app_id = 'YOUR_APP_ID',                -- Lark app ID
    app_secret = 'YOUR_APP_SECRET',        -- Lark app secret
    chat_id = 'YOUR_CHAT_ID',              -- Lark chat ID
  },

  -- DingTalk
  dingtalk = {
    -- Webhook mode (one-way, simpler)
    webhook = 'https://oapi.dingtalk.com/robot/send?access_token=XXX',
    -- OR API mode (two-way, requires app credentials)
    app_key = 'YOUR_APP_KEY',
    app_secret = 'YOUR_APP_SECRET',
    conversation_id = 'YOUR_CONVERSATION_ID',
    user_id = 'YOUR_USER_ID',
  },

  -- WeCom (Enterprise WeChat)
  wecom = {
    -- Webhook mode (one-way, simpler)
    webhook_key = 'YOUR_WEBHOOK_KEY',
    -- OR API mode (two-way, requires corporate credentials)
    corp_id = 'YOUR_CORP_ID',
    corp_secret = 'YOUR_CORP_SECRET',
    agent_id = 'YOUR_AGENT_ID',
    user_id = 'YOUR_USER_ID',
  },

  -- Telegram
  telegram = {
    bot_token = 'YOUR_BOT_TOKEN',          -- Telegram bot token
    chat_id = 'YOUR_CHAT_ID',              -- Telegram chat ID
  },
},
Platform Comparison:
| Platform | Mode | Bidirectional | Setup Complexity | Message Limit |
|---|---|---|---|---|
| Discord | Bot API | ✅ Yes | Medium | 2,000 chars |
| Lark | Bot API | ✅ Yes | Medium | 30,720 chars |
| DingTalk | Webhook | ❌ No | Low | 20,000 chars |
| DingTalk | API | ✅ Yes | High | 20,000 chars |
| WeCom | Webhook | ❌ No | Low | 2,048 chars |
| WeCom | API | ✅ Yes | High | 2,048 chars |
| Telegram | Bot API | ✅ Yes | Low | 4,096 chars |
Complete Configuration Example
require('chat').setup({
  -- Window settings
  width = 0.8,
  height = 0.8,
  auto_scroll = true, -- Enable smart auto-scrolling (default)
  border = 'rounded',

  -- AI provider settings
  provider = 'deepseek',
  model = 'deepseek-chat',
  api_key = {
    deepseek = 'sk-xxxxxxxxxxxx',
    github = 'github_pat_xxxxxxxx',
  },

  -- HTTP server configuration
  http = {
    host = '127.0.0.1',
    port = 7777,
    api_key = 'your-secret-key-here', -- Set to empty string to disable
  },

  -- File access control
  allowed_path = {
    vim.fn.getcwd(), -- Current working directory
    vim.fn.expand('~/.config/nvim'), -- Neovim config directory
  },

  -- Other settings
  strftime = '%Y-%m-%d %H:%M',
  system_prompt = function()
    local path = vim.fn.expand('./AGENTS.md')
    if vim.fn.filereadable(path) == 1 then
      return table.concat(vim.fn.readfile(path), '\n')
    end
    return 'You are a helpful programming assistant.'
  end,

  -- Memory system
  memory = {
    enable = true,
    max_memories = 1000,
    retrieval_limit = 5,
    similarity_threshold = 0.25,
  },

  -- IM Integrations (configure platforms you need)
  integrations = {
    -- Discord
    discord = {
      token = 'YOUR_DISCORD_BOT_TOKEN',
      channel_id = 'YOUR_CHANNEL_ID',
    },
    -- Add other platforms as needed...
  },
  -- MCP servers configuration
  mcp = {
    --https://github.com/Aas-ee/open-webSearch
    open_webSearch = {
      command = 'npx',
      args = {
        '-y',
        'open-websearch@latest',
      },
    },
  },
})
Configuration Notes
- Path Security:
allowed_pathrestricts which file paths tools can access. Empty string disables all file access. Recommended to set to your current project directory for security. - API Keys: Only configure keys for providers you plan to use. Providers can be switched at runtime via the picker.
- Memory System: Enabled by default, automatically extracts facts and preferences from conversations. Can be disabled with
memory.enable = false. - HTTP Server: Configure
http.api_keyto enable the HTTP server. The server binds to localhost by default for security. - Dynamic Updates: Some configurations (like provider and model) can be changed dynamically at runtime via the picker.
- Automatic Scrolling: The
auto_scrolloption controls whether the result window automatically scrolls to show new content. When enabled (default), it only scrolls if the cursor was already at the bottom, preventing interruptions when reviewing history. - system_prompt Function Support: The
system_promptoption can be either a string or a function that returns a string. When a function is provided, it is called each time a new session is created, allowing for dynamic prompts based on time, project context, or external files. The function should handle errors gracefully and return a string value.
⚙️ Usage
chat.nvim provides several commands to manage your AI conversations.
The main command is :Chat, which opens the chat window.
You can also navigate between sessions using the following commands.
Basic Commands
| Command | Description |
|---|---|
:Chat |
Open the chat window with the current session |
:Chat new |
Start a new chat session |
:Chat prev |
Switch to the previous chat session |
:Chat next |
Switch to the next chat session |
:Chat delete |
Delete current session and create new empty session |
:Chat clear |
Clear all messages in current session |
:Chat cd <dir> |
Change current session cwd, open chat window |
:Chat save <path> |
Save current session to specified file path |
:Chat load <path> |
Load session from file path or URL |
:Chat share |
Share current session via pastebin |
:Chat preview |
Open HTML preview of current session in browser |
:Chat bridge |
Bind current session to external platform (Discord) |
:Chat mcp stop |
Stop all MCP servers |
:Chat mcp start |
Start all MCP servers |
:Chat mcp restart |
Restart all MCP servers |
MCP Commands
Manage MCP (Model Context Protocol) servers with the following commands:
Stop MCP servers:
:Chat mcp stopStops all running MCP servers and cleans up resources.
Start MCP servers:
:Chat mcp startStarts all configured MCP servers. Note: Servers are automatically started when opening the chat window.
Restart MCP servers:
:Chat mcp restartRestarts all MCP servers (stops and starts with a delay for cleanup).
Notes:
- MCP servers are automatically started when you open the chat window (
:Chat) - MCP servers are automatically stopped when you exit Neovim
- Use these commands for manual control if needed (e.g., after changing configuration)
Parallel Sessions
chat.nvim supports running multiple chat sessions simultaneously, with each session operating independently:
- Independent Model Selection: Each session can use a different AI model (e.g., Session A with DeepSeek, Session B with GitHub AI)
- Separate Contexts: Sessions maintain their own conversation history, working directory, and settings
- Quick Switching: Use
:Chat prevand:Chat nextto navigate between active sessions - Isolated Workflows: Perfect for comparing model responses or working on multiple projects simultaneously
Workflow Example:
- Start a session with DeepSeek:
:Chat new(then select DeepSeek model) - Switch to GitHub AI for a different task:
:Chat new(select GitHub model) - Toggle between sessions:
:Chat prev/:Chat next - Each session preserves its unique context and conversation flow
Examples
Start a new conversation:
:Chat newThis creates a fresh session and opens the chat window.
Resume a previous conversation:
:Chat prevCycles backward through your saved sessions.
Switch to the next conversation:
:Chat nextCycles forward through your saved sessions.
Open or forced to the chat window:
:ChatThis command will not change current sessions.
Delete current session:
:Chat deleteCycles to next session or create a new session if current session is latest one.
Change the working directory of current session:
:Chat cd ../picker.nvim/If the current session is in progress, the working directory will not be changed, and a warning message will be printed.
Clear messages in current session:
:Chat clearIf the current session is in progress, a warning message will be printed, and current session will not be cleared. This command also will forced to chat window.
Work with multiple parallel sessions:
" Start first session with DeepSeek
:Chat new
" Select DeepSeek as provider and choose a model

" Start second session with GitHub AI
:Chat new
" Select GitHub as provider and choose a model

" Switch between sessions
:Chat prev  " Go to first session
:Chat next  " Go to second session
This enables simultaneous conversations with different AI assistants for different tasks.
Save current session to a file:
:Chat save ~/sessions/my-session.jsonSaves the current session to a JSON file for backup or sharing.
Load session from file:
:Chat load ~/sessions/my-session.jsonLoads a previously saved session from a JSON file.
Load session from URL:
:Chat load https://paste.rs/xxxxxLoads a session from a URL (e.g., from paste.rs).
Share current session:
:Chat shareUploads the current session to paste.rs and copies the URL to clipboard. This allows easy sharing of conversations with others.
Preview current session in browser:
:Chat previewOpens an HTML preview of the current session in your default browser. The preview includes session metadata, messages, tool calls, and token usage statistics. You can also use
<C-o>in the picker's chat source to open previews.
All sessions are automatically saved and can be resumed later. For more advanced session management, see the Picker Integration section below.
Key Bindings
Note: The plugin is currently in active development phase. Key bindings may change and may reflect the author's personal preferences. Configuration options for customizing key bindings are planned for future releases.
The following key bindings are available in the Input window:
| Mode | Key Binding | Description |
|---|---|---|
Normal |
<Enter> |
Send message |
Normal |
q |
Close chat window |
Normal |
<Tab> |
Switch between input and result windows |
Normal |
Ctrl-C |
Cancel current request |
Normal |
Ctrl-N |
Open new session |
Normal |
r |
Retry last cancelled request |
Normal |
alt-h |
previous chat session |
Normal |
alt-l |
next chat session |
Normal |
<Leader>fr |
run :Picker chat |
Normal |
<Leader>fp |
run :Picker chat_provider |
Normal |
<Leader>fm |
run :Picker chat_model |
The following key bindings are available in the Result window:
| Mode | Key Binding | Description |
|---|---|---|
Normal |
q |
Close chat window |
Normal |
<Tab> |
Switch between input and result windows |
🤖 Providers
chat.nvim uses a two-layer architecture for AI service integration:
- Providers: Handle HTTP requests to specific AI services (DeepSeek, OpenAI, GitHub, etc.)
- Protocols: Parse API responses from different AI services (OpenAI, Anthropic, etc.)
Most AI services use OpenAI-compatible APIs, so the default protocol is openai. Providers can specify a custom protocol via the protocol field if needed.
Built-in Providers
deepseek- DeepSeek AIgithub- GitHub AImoonshot- Moonshot AIopenrouter- OpenRouterqwen- Alibaba Cloud Qwensiliconflow- SiliconFlowtencent- Tencent Hunyuanbigmodel- BigModel AIvolcengine- Volcengine AIopenai- OpenAIanthropic- Anthropic Claudegemini- Google Geminiollama- Ollamalongcat- LongCat AIcherryin- CherryIN AIyuanjing- yuanjing AI
Note: Most built-in providers use the OpenAI protocol by default. Exceptions:
anthropicuses the Anthropic protocolgeminiuses the Gemini protocol
Custom Providers
You can create custom providers for AI services not in the built-in list. Create a file at ~/.config/nvim/lua/chat/providers/<provider_name>.lua.
A provider module must implement:
available_models()- Return a list of available model namesrequest(opt)- Send HTTP request and return job ID
Optional fields:
protocol- Specify which protocol to use (default:openai)
Example custom provider:
-- ~/.config/nvim/lua/chat/providers/my_provider.lua
local M = {}
local job = require('job')
local sessions = require('chat.sessions')
local config = require('chat.config')

function M.available_models()
  return {
    'model-1',
    'model-2',
  }
end

function M.request(opt)
  local cmd = {
    'curl',
    '-s',
    'https://api.example.com/v1/chat/completions',
    '-H',
    'Content-Type: application/json',
    '-H',
    'Authorization: Bearer ' .. config.config.api_key.my_provider,
    '-X',
    'POST',
    '-d',
    '@-',
  }

  local body = vim.json.encode({
    model = sessions.get_session_model(opt.session),
    messages = opt.messages,
    stream = true,
    stream_options = { include_usage = true },
    tools = require('chat.tools').available_tools(),
  })

  local jobid = job.start(cmd, {
    on_stdout = opt.on_stdout,
    on_stderr = opt.on_stderr,
    on_exit = opt.on_exit,
  })
  job.send(jobid, body)
  job.send(jobid, nil)
  sessions.set_session_jobid(opt.session, jobid)

  return jobid
end

-- Optional: specify custom protocol (defaults to 'openai')
-- M.protocol = 'anthropic'

return M
Protocols
Protocols handle parsing of API responses. Currently, chat.nvim supports:
openai: OpenAI-compatible API format (default for all built-in providers)anthropic: Anthropic Claude API formatgemini: Google Gemini API format
If you need a custom protocol, create a file at ~/.config/nvim/lua/chat/protocols/<protocol_name>.lua and implement:
on_stdout(id, data)- Handle stdout data from curlon_stderr(id, data)- Handle stderr dataon_exit(id, code, signal)- Handle request completion
See lua/chat/protocol/openai.lua for reference implementation.
🛠️ Tools
chat.nvim supports tool call functionality, allowing the AI assistant to interact with your filesystem, manage memories, and perform other operations during conversations. Tools are invoked using the @tool_name syntax directly in your messages.
MCP Tools
MCP (Model Context Protocol) tools are automatically discovered and integrated when MCP servers are configured. These tools follow the naming pattern mcp_<server>_<tool> and work seamlessly with built-in tools.
Example MCP Tools:
mcp_open_webSearch_search- Web search via MCP servermcp_open_webSearch_fetchGithubReadme- Fetch GitHub README via MCPmcp_open_webSearch_fetchCsdnArticle- Fetch CSDN article via MCP
MCP tools are automatically available when their servers are configured in the mcp section of your setup configuration. See MCP Server Configuration for details.
Using MCP Tools:
@mcp_open_webSearch_search query="neovim plugins" engines=["bing"] limit=10
@mcp_open_webSearch_fetchGithubReadme url="https://github.com/wsdjeg/chat.nvim"
MCP tools support all parameter types defined by their servers and execute asynchronously without blocking Neovim's UI.
Available Tools
read_file
Reads the content of a file and makes it available to the AI assistant.
Usage:
@read_file <filepath>
Examples:
@read_file ./src/main.lua- Read a Lua file in the current directory@read_file /etc/hosts- Read a system file using absolute path@read_file ../config.json- Read a file from a parent directory
Advanced Usage with Line Ranges:
@read_file ./src/main.lua line_start=10 line_to=20
Notes:
- File paths can be relative to the current working directory or absolute
- Supports line range selection with
line_startandline_toparameters - Line numbers are 1-indexed (first line is line 1)
- If
line_startis not specified, defaults to line 1 - If
line_tois not specified, defaults to last line - The AI will receive the file content for context
- This is particularly useful for code review, debugging, or analyzing configuration files
find_files
Finds files in the current working directory that match a given pattern.
Usage:
@find_files <pattern>
Examples:
@find_files *.lua- Find all Lua files in the current directory@find_files **/*.md- Recursively find all Markdown files@find_files src/**/*.js- Find JavaScript files in thesrcdirectory and its subdirectories@find_files README*- Find files starting with "README"
Notes:
- Uses ripgrep (rg) for fast file finding with glob pattern support
- Smart case: lowercase patterns are case-insensitive, uppercase are case-sensitive
- Supports additional parameters:
directory,hidden,no_ignore,exclude - Searches are limited to the current working directory
- Returns a list of found files, with one file path per line
- File searching is restricted by the
allowed_pathconfiguration setting
search_text
Advanced text search tool using ripgrep (rg) to search text content in directories with regex support, file type filtering, exclusion patterns, and other advanced features.
Usage:
@search_text <pattern> [options]
Basic Examples:
@search_text "function.*test"- Search for regex pattern in current directory@search_text "TODO:" --file-types "*.lua"- Search TODO comments in Lua files@search_text "error" --context-lines 2- Search for "error" with 2 lines of context
Advanced Usage with JSON Parameters:
For more complex searches, you can provide a JSON object with multiple parameters:
@search_text {"pattern": "function.*test", "directory": "./src", "file_types": ["*.lua", "*.vim"], "ignore_case": true, "max_results": 50}
Parameters:
| Parameter | Type | Description |
|---|---|---|
pattern |
string | Required. Text pattern to search for (supports regex) |
directory |
string | Directory path to search in (default: current working directory) |
ignore_case |
boolean | Whether to ignore case (default: false) |
regex |
boolean | Whether to use regex (default: true) |
max_results |
integer | Maximum number of results (default: 100) |
context_lines |
integer | Number of context lines to show around matches (default: 0) |
whole_word |
boolean | Whether to match whole words only (default: false) |
file_types |
array | File type filter, e.g., ["*.py", "*.md", "*.txt"] |
exclude_patterns |
array | Exclude file patterns, e.g., ["*.log", "node_modules/*"] |
More Examples:
Case-insensitive search:
@search_text {"pattern": "config", "ignore_case": true}Search with file type filtering:
@search_text {"pattern": "function", "file_types": ["*.lua", "*.vim"]}Search with context and exclusions:
@search_text {"pattern": "FIXME", "context_lines": 3, "exclude_patterns": ["*.log", "node_modules/*"]}Whole word matching:
@search_text {"pattern": "test", "whole_word": true}
Notes:
- Uses ripgrep (rg) for fast, powerful text searching
- Supports full regex syntax for complex pattern matching
- Search is restricted by the
allowed_pathconfiguration setting - Returns matching lines with file paths and line numbers
- If no matches are found, returns an informative message
- Particularly useful for code analysis, debugging, and finding references
extract_memory
Extract memories from conversation text into a three-tier memory system (working, daily, long-term). Automatically detects memory type and category based on content analysis.
Usage:
@extract_memory <parameters>
Memory Types:
| Type | Icon | Lifetime | Priority | Use Case |
|---|---|---|---|---|
working |
⚡ | Session only | Highest | Current tasks, decisions, active context |
daily |
📅 | 7-30 days | Medium | Short-term goals, today's tasks, reminders |
long_term |
💾 | Permanent | Normal | Facts, preferences, skills, knowledge |
Basic Examples:
@extract_memory text="Python的GIL是全局解释器锁,我习惯用Vim写代码"(auto-detect type and category)@extract_memory text="今天要完成用户登录功能" memory_type="daily"(force daily memory)@extract_memory text="当前正在修复登录bug" memory_type="working"(force working memory)
Advanced Examples:
Extract with specific type and category:
@extract_memory text="Python的GIL是全局解释器锁" memory_type="long_term" category="fact"Extract working memory with importance:
@extract_memory text="当前任务:实现用户认证" memory_type="working" importance="high"Extract daily memory:
@extract_memory text="今天下午3点有会议" memory_type="daily" category="event"Batch extract multiple memories:
@extract_memory memories='[{"content":"事实1","category":"fact","memory_type":"long_term"},{"content":"偏好1","category":"preference"}]'
Parameters:
| Parameter | Type | Description |
|---|---|---|
text |
string | Text to analyze for memory extraction |
memories |
array | Pre-extracted memories array (alternative to text parameter) |
memory_type |
string | Memory type: "long_term", "daily", or "working" (auto-detected if not set) |
category |
string | Category: "fact", "preference", "skill", or "event" (auto-detected if not set) |
Memory Object Structure (for memories array):
{
  "content": "Memory content text",
  "memory_type": "working", // Optional: auto-detected if not specified
  "category": "fact", // Optional: auto-detected if not specified
  "work_type": "task", // Optional: only for working memory
  "importance": "high" // Optional: only for working memory
}
Category Definitions:
- fact: Verifiable objective facts, data, definitions, rules
- preference: Personal habits, routine behaviors, regular practices
- skill: Technical abilities and knowledge
- event: Specific events and occurrences
Working Memory Types:
- general: General information
- task: Current task or goal
- decision: Decision or choice made
- context: Contextual information
- issue: Issue or problem encountered
Auto-Detection Rules:
The system automatically detects memory type based on keywords:
- Working Memory: "当前/正在/current", "任务/task", "决策/decision", "问题/issue"
- Daily Memory: "今天/明天/today/tomorrow", "待办/todo", "临时/temporary"
- Long-term Memory: Other persistent information
Notes:
- Extracts only persistent and reusable information
- Automatically detects categories and memory types based on keywords
- Supports both raw text analysis and pre-processed memories
- Working memory has highest priority and is cleared when session ends
- Daily memory expires after configured retention days (default: 7)
- Long-term memory persists permanently
- Memory system must be enabled in chat.nvim configuration
recall_memory
Retrieve relevant information from the three-tier memory system with priority-based ranking. Automatically extracts keywords if no query is provided.
Usage:
@recall_memory <parameters>
Memory Priority Order:
- ⚡ Working Memory - Current session tasks/decisions (highest priority)
- 📅 Daily Memory - Recent temporary information (medium priority)
- 💾 Long-term Memory - Permanent knowledge base (normal priority)
Basic Examples:
@recall_memory query="vim configuration"- Search all memory types@recall_memory- Auto-extract keywords from current conversation@recall_memory query="current task" memory_type="working"- Search only working memory@recall_memory query="today" memory_type="daily"- Search only daily memory@recall_memory query="python" memory_type="long_term"- Search only long-term memory
Advanced Examples:
Search with limit:
@recall_memory query="programming tips" limit=8Filter by memory type:
@recall_memory query="current task" memory_type="working"Search across all sessions:
@recall_memory query="vim" all_sessions=trueAuto-extract from conversation:
@recall_memory
Parameters:
| Parameter | Type | Description |
|---|---|---|
query |
string | Search query (optional, auto-extracted from last message if not provided) |
memory_type |
string | Filter by memory type: "working", "daily", or "long_term" (optional) |
limit |
integer | Number of results (default: 5, maximum: 10) |
all_sessions |
boolean | Search all sessions instead of just current (default: false) |
Output Format:
📚 Retrieved 3 memories (⚡ working: 1, 📅 daily: 1, 💾 long_term: 1)

1. ⚡ working 📋 [task]
   > 当前任务:实现用户认证功能
   🕒 2025-01-15 14:30 | 🎯 High Priority | 🏷️ task

2. 📅 daily 📅 [event]
   > 今天下午3点有团队会议
   🕒 2025-01-15 09:15 | Expires in 6 days

3. 💾 long_term 📚 [skill]
   > Python GIL是全局解释器锁,影响多线程性能
   🕒 2025-01-10 16:42 | Accessed 5 times

🔧 Actions:
• Working memory will be cleaned after session ends
• Daily memory expires in 7-30 days
• Use `@recall_memory memory_type="long_term"` to filter by type
Notes:
- Returns formatted memory list that AI can reference for responses
- Searches across all memory types with priority ranking
- Working memory has highest priority and session isolation
- Daily memory shows expiration countdown
- Long-term memory shows access frequency
- Shows timestamps and contextual information
- Memory system must be enabled in chat.nvim configuration
- Useful for maintaining context across conversations
set_prompt
Read a prompt file and set it as the current session's system prompt.
Usage:
@set_prompt <filepath>
Examples:
@set_prompt ./AGENTS.md@set_prompt ./prompts/code_review.txt@set_prompt ~/.config/chat.nvim/default_prompt.md
Parameters:
| Parameter | Type | Description |
|---|---|---|
filepath |
string | Path to prompt file |
Notes:
- Updates the current session's system prompt with file content
- File must be within the
allowed_pathconfigured in chat.nvim - Useful for switching between different agent roles or task-specific prompts
- Supports relative and absolute paths
fetch_web
Fetch content from web URLs using curl with comprehensive HTTP support.
Usage:
@fetch_web <parameters>
Basic Examples:
@fetch_web url="https://example.com"- Fetch content from a URL@fetch_web url="https://api.github.com/repos/neovim/neovim" timeout=60 user_agent="MyApp/1.0"- Fetch with custom timeout and user agent@fetch_web url="https://api.github.com/user" headers=["Authorization: Bearer token123"]- Fetch with custom headers@fetch_web url="https://api.example.com/data" method="POST" data='{"key":"value"}' headers=["Content-Type: application/json"]- POST request with JSON data@fetch_web url="https://self-signed.example.com" insecure=true- Disable SSL verification (testing only)@fetch_web url="https://example.com/redirect" max_redirects=2- Limit redirects
Advanced Usage with JSON Parameters:
For complex requests, you can provide a JSON object:
@fetch_web {"url": "https://example.com", "method": "POST", "data": "{\"key\":\"value\"}", "headers": ["Content-Type: application/json"], "timeout": 30}
Parameters:
| Parameter | Type | Description |
|---|---|---|
url |
string | Required. URL to fetch (must start with http:// or https://) |
method |
string | HTTP method (default: "GET", options: GET, POST, PUT, DELETE, PATCH, HEAD) |
headers |
array | Additional HTTP headers as strings (e.g., ["Authorization: Bearer token", "Accept: application/json"]) |
data |
string | Request body data for POST/PUT requests |
timeout |
integer | Timeout in seconds (default: 30, minimum: 1, maximum: 300) |
user_agent |
string | Custom User-Agent header string (default: "Mozilla/5.0 (compatible; chat.nvim)") |
insecure |
boolean | Disable SSL certificate verification (use with caution, for testing only) |
max_redirects |
integer | Maximum number of redirects to follow (default: 5, set to 0 to disable) |
output |
string | Save response to file instead of displaying (e.g., "./response.html") |
More Examples:
Basic GET request:
@fetch_web url="https://jsonplaceholder.typicode.com/posts/1"POST request with JSON data:
@fetch_web url="https://api.example.com/users" method="POST" data='{"name": "John", "age": 30}' headers=["Content-Type: application/json"]With authentication header:
@fetch_web url="https://api.github.com/user/repos" headers=["Authorization: Bearer YOUR_TOKEN", "Accept: application/vnd.github.v3+json"]Save response to file:
@fetch_web url="https://example.com" output="./downloaded_page.html"Configure timeout and SSL verification:
@fetch_web url="https://slow-api.example.com" timeout=60 insecure=true
Notes:
- Uses curl internally for HTTP/HTTPS requests
- Requires curl to be installed and available in PATH
- SSL verification is enabled by default (disable with
insecure=truefor testing) - Responses are limited to 10,000 characters for display
- For large responses, use the
outputparameter to save to a file - Compression is automatically requested
- Timeout defaults to 30 seconds to prevent hanging
- User agent identifies as chat.nvim by default
- Only HTTP/HTTPS URLs are allowed (no file://, ftp://, etc.)
- Particularly useful for fetching API data, web scraping, or downloading content
web_search
Search the web using Firecrawl, Google Custom Search API, or SerpAPI.
Usage:
@web_search <parameters>
Supported Engines:
- Firecrawl (default): https://firecrawl.dev
- Google: Google Custom Search JSON API
- SerpAPI: https://serpapi.com - supports multiple search engines (Google, Bing, DuckDuckGo, etc.)
Configuration:
API keys must be set in chat.nvim configuration:
require('chat').setup({
  api_key = {
    firecrawl = 'fc-YOUR_API_KEY',
    google = 'YOUR_GOOGLE_API_KEY',
    google_cx = 'YOUR_SEARCH_ENGINE_ID',
    serpapi = 'YOUR_SERPAPI_KEY'
  }
})
Alternatively, provide API keys directly as parameters.
Examples:
Basic Firecrawl search:
@web_search query="firecrawl web scraping"Firecrawl with result limit:
@web_search query="neovim plugins" limit=10Google search:
@web_search query="latest news" engine="google"Google search with custom API key and cx:
@web_search query="test" engine="google" api_key="GOOGLE_API_KEY" cx="SEARCH_ENGINE_ID"SerpAPI with Google (default):
@web_search query="neovim plugins" engine="serpapi"SerpAPI with Bing:
@web_search query="latest news" engine="serpapi" serpapi_engine="bing"SerpAPI with DuckDuckGo:
@web_search query="privacy tools" engine="serpapi" serpapi_engine="duckduckgo"Custom timeout:
@web_search query="slow site" timeout=60Firecrawl with scrape options:
@web_search query="news" scrape_options={"formats":["markdown"]}
Parameters:
| Parameter | Type | Description |
|---|---|---|
query |
string | Required. Search query string |
engine |
string | Search engine to use: "firecrawl", "google", or "serpapi" (default: "firecrawl") |
limit |
integer | Number of results to return (default: 5 for firecrawl, 10 for google/serpapi) |
scrape_options |
object | Options for scraping result pages (Firecrawl only, see Firecrawl docs) |
api_key |
string | API key (optional if configured in config) |
cx |
string | Google Custom Search engine ID (required for Google engine if not in config) |
timeout |
integer | Timeout in seconds (default: 30, minimum: 1, maximum: 300) |
serpapi_engine |
string | SerpAPI search engine: "google", "bing", "duckduckgo", "yahoo", "baidu", etc. (optional) |
SerpAPI Search Engines:
When using SerpAPI, you can specify different search engines via the serpapi_engine parameter:
| Engine | Description |
|---|---|
google |
Google Search |
bing |
Microsoft Bing |
duckduckgo |
DuckDuckGo |
yahoo |
Yahoo Search |
baidu |
Baidu |
yandex |
Yandex |
ebay |
eBay Search |
| ...and more | See SerpAPI docs |
Notes:
- Requires curl to be installed and available in PATH
- Firecrawl API key is required for Firecrawl searches
- Google API key and Custom Search engine ID (cx) are required for Google searches
- SerpAPI key is required for SerpAPI searches
- SerpAPI supports multiple search engines (Google, Bing, DuckDuckGo, etc.) through the
serpapi_engineparameter - Search results are returned in a formatted list with titles, URLs, and snippets
- Supports both Firecrawl, Google, and SerpAPI search engines with configurable options
git_diff
Run git diff to compare changes between working directory, index, or different branches.
Usage:
@git_diff <parameters>
Basic Examples:
@git_diff- Show all unstaged changes in the repository@git_diff cached=true- Show staged changes (--cached)@git_diff branch="main"- Compare working directory with main branch@git_diff path="./src"- Show changes for specific file or directory@git_diff branch="master" cached=true- Compare staged changes with master branch
Advanced Usage with JSON Parameters:
For more complex comparisons, you can provide a JSON object:
@git_diff {"path": "./lua/chat", "branch": "develop", "cached": true}
Parameters:
| Parameter | Type | Description |
|---|---|---|
path |
string | File or directory path to show diff for (optional) |
cached |
boolean | Show staged changes (git diff --cached) (optional) |
branch |
string | Branch to compare against (e.g., "master", "origin/main") (optional) |
More Examples:
View all unstaged changes:
@git_diffView staged changes only:
@git_diff cached=trueCompare with another branch:
@git_diff branch="main"Check changes in specific file:
@git_diff path="./lua/chat/tools/git_diff.lua"Compare staged changes with master branch:
@git_diff branch="master" cached=trueCombined usage:
@git_diff {"path": "./lua/chat/tools", "branch": "develop", "cached": false}
Notes:
- Requires git to be installed and available in PATH
- If no parameters are provided, shows all unstaged changes in the repository
- The
cachedflag shows changes that are staged (git diff --cached) - The
branchparameter allows comparing with another branch (git diff ) - The
pathparameter restricts diff output to specific file or directory - Returns formatted git diff output with file names and change summaries
- Particularly useful for code review, version control, and change tracking
- Asynchronous Execution: This tool runs asynchronously without blocking Neovim's UI
git_log
Show commit logs with various filters and options.
Usage:
@git_log [parameters]
Basic Examples:
@git_log- Show last 5 commits (default)@git_log count=10- Show last 10 commits@git_log count=0- Show all commits (no limit)@git_log path="./src/main.lua"- Show commits for specific file@git_log author="john"- Filter by author@git_log since="2024-01-01"- Commits since date@git_log from="v1.4.0"- Commits from tag to HEAD@git_log from="v1.0.0" to="v2.0.0"- Commits between tags@git_log grep="fix"- Search in commit messages
Parameters:
| Parameter | Type | Description |
|---|---|---|
path |
string | File or directory path (default: current working directory) |
count |
integer | Limit number of commits (default: 5, use 0 for no limit) |
oneline |
boolean | Show each commit on a single line (default: true) |
author |
string | Filter commits by author name or email |
since |
string | Show commits after this date (e.g., "2024-01-01", "2 weeks ago") |
from |
string | Starting tag/commit for range (e.g., "v1.4.0") |
to |
string | Ending tag/commit for range (default: HEAD) |
grep |
string | Search for pattern in commit messages |
Notes:
- Requires git to be installed and available in PATH
- If filters are set (author/since/grep/from/to), count defaults to no limit
- Date formats: "2024-01-01", "2 weeks ago", "yesterday", etc.
- Grep supports regex patterns in commit messages
git_status
Show the working tree status.
Usage:
@git_status [parameters]
Basic Examples:
@git_status- Show repository status (short format)@git_status path="./src"- Status for specific path@git_status short=false- Long format output@git_status show_branch=false- Hide branch info
Parameters:
| Parameter | Type | Description |
|---|---|---|
path |
string | File or directory path (optional) |
short |
boolean | Use short format (default: true) |
show_branch |
boolean | Show branch info (default: true) |
Output (short mode):
Branch: master...origin/master

  M  file.lua (staged)
   M file.lua (modified)
  ?? file.lua (untracked)
Notes:
- Requires git to be installed and available in PATH
- Short format shows status codes with file names
- Status codes:
M(modified),A(added),D(deleted),R(renamed),C(copied),??(untracked),!!(ignored) - Left column: staged status, Right column: unstaged status
- Particularly useful for quick repository status checks
git_show
Show detailed changes of a specific commit.
Usage:
@git_show commit=<commit> [parameters]
Basic Examples:
@git_show commit="abc123"- Show commit details@git_show commit="v1.0.0"- Show tag commit@git_show commit="HEAD~1"- Show previous commit@git_show commit="abc123" stat=true- Show stat only (file list)@git_show commit="abc123" path="./src/main.lua"- Show changes for specific file
Parameters:
| Parameter | Type | Description |
|---|---|---|
commit |
string | Commit hash, tag, or reference (e.g., "abc123", "v1.0.0", "HEAD~1") |
stat |
boolean | Show stat only (file list with change counts) (optional) |
path |
string | Filter to specific file path (optional) |
Notes:
- Requires git to be installed and available in PATH
commitcan be a commit hash, tag, or relative reference- Use
stat=trueto see only the file list with change counts - Use
pathto filter changes to a specific file - Particularly useful for reviewing specific commits without switching branches
get_history
Get conversation history messages from the current session.
Usage:
@get_history [parameters]
Basic Examples:
@get_history- Get first 20 messages (default)@get_history offset=0 limit=20- Get first 20 messages (oldest)@get_history offset=20 limit=20- Get messages 21-40@get_history offset=0 limit=50- Get first 50 messages (max)
Parameters:
| Parameter | Type | Description |
|---|---|---|
offset |
integer | Starting index (0 = oldest message, default: 0) |
limit |
integer | Number of messages to retrieve (default: 20, max: 50) |
Notes:
- Use this tool when you need to reference earlier messages not in current context window
- Returns messages with their role, content, and timestamp
- Maximum 50 messages per request
- Useful for maintaining context across long conversations
plan
Plan mode for creating, managing, and reviewing task plans with step-by-step tracking.
Usage:
@plan action="<action>" [parameters]
Actions:
| Action | Description |
|---|---|
create |
Create new plan with title and optional steps |
show |
Show plan details by ID |
list |
List all plans (optional status filter) |
add |
Add step to existing plan |
next |
Start next pending step |
done |
Mark current/completed step as done |
review |
Review completed plan with summary |
delete |
Delete a plan |
Basic Examples:
Create a new plan:
@plan action="create" title="Implement feature X" steps=["Design API", "Write code", "Test"]List all plans:
@plan action="list"List plans with status filter:
@plan action="list" status="in_progress"Show plan details:
@plan action="show" plan_id="plan-20250110-1234"Start next step:
@plan action="next" plan_id="plan-20250110-1234"Complete a step:
@plan action="done" plan_id="plan-20250110-1234" step_id=1Add step to existing plan:
@plan action="add" plan_id="plan-20250110-1234" step_content="Add documentation"Review completed plan:
@plan action="review" plan_id="plan-20250110-1234" summary="Feature implemented successfully" lessons=["Lesson 1", "Lesson 2"]Delete a plan:
@plan action="delete" plan_id="plan-20250110-1234"
Advanced Usage with JSON Parameters:
For more complex operations, you can provide a JSON object:
@plan {"action": "create", "title": "Refactor codebase", "steps": ["Analyze current structure", "Design new architecture", "Migrate modules", "Update tests"]}
Parameters:
| Parameter | Type | Description |
|---|---|---|
action |
string | Required. Plan action to perform (create, show, list, add, next, done, review, delete) |
title |
string | Plan title (required for create action) |
steps |
array | Initial steps array (optional for create action) |
plan_id |
string | Plan ID (required for show, add, next, done, review, delete) |
step_content |
string | Step content (required for add action) |
step_id |
integer | Step ID (required for done action, auto-detected if not provided) |
notes |
string | Notes for step completion (optional for done action) |
status |
string | Filter by status for list action (pending, in_progress, completed) |
summary |
string | Plan summary (for review action) |
lessons |
array | Lessons learned (for review action) |
issues |
array | Issues encountered (for review action) |
Workflow Example:
Create a plan:
@plan action="create" title="Build REST API" steps=["Design endpoints", "Implement handlers", "Add authentication", "Write tests", "Deploy"]Response:
✅ Plan created: **Build REST API** ID: plan-20250115-5678Start first step:
@plan action="next" plan_id="plan-20250115-5678"Response:
⏳ **Started Step 1:** Design endpointsComplete the step:
@plan action="done" plan_id="plan-20250115-5678" notes="API endpoints documented"Response:
✅ **Completed Step 1:** Design endpointsContinue with remaining steps...
Review the plan:
@plan action="review" plan_id="plan-20250115-5678" summary="API successfully built and deployed" lessons=["Test early", "Document as you go"]
Notes:
- Requires memory system to be enabled in chat.nvim configuration (
memory.enable = true) - Plans are automatically saved to
plans.jsonin the memory storage directory - Plan IDs follow the format
plan-YYYYMMDD-XXXX(e.g.,plan-20250110-1234) - Steps are automatically tracked with status: pending, in_progress, completed
- When completing a step without
step_id, the tool auto-detects the current in-progress step - Plan reviews are stored in long-term memory for future reference
- Supports progress tracking with visual indicators (✅ completed, ⏳ in progress, ⬜ pending)
- Particularly useful for task management, project planning, and workflow organization
Third-party Tools
zettelkasten_create
Create new zettelkasten notes, provided by zettelkasten.nvim.
Usage:
@zettelkasten_create <parameters>
Parameters:
| Parameter | Type | Description |
|---|---|---|
title |
string | The title of zettelkasten note |
content |
string | The note body of zettelkasten |
tags |
array | Optional tags for the note (max 3) |
Notes:
- Creates a new zettelkasten note with specified title and content
- Tags should be in English and limited to 3 to avoid synonyms
- Integration with zettelkasten.nvim plugin
zettelkasten_get
Retrieve zettelkasten notes by tags, provided by zettelkasten.nvim.
Usage:
@zettelkasten_get <tags>
Parameters:
| Parameter | Type | Description |
|---|---|---|
tags |
array | Tags to search for (e.g., ["programming", "vim"]) |
Notes:
- Returns JSON object containing matching notes
- Each note includes
file_nameandtitlefields - Tags should be in English
- Integration with zettelkasten.nvim plugin
How to Use Tools
Direct invocation: Include the tool call directly in your message:
Can you review this code? @read_file ./my_script.luaMultiple tools: Combine multiple tools in a single message:
Compare these two configs: @read_file ./config1.json @read_file ./config2.jsonNatural integration: The tool calls can be embedded naturally within your questions:
What's wrong with this function? @read_file ./utils.luaMemory management: Use memory tools for context-aware conversations:
Based on what we discussed earlier about Vim: @recall_memory query="vim"
The AI assistant will process the tool calls, execute the specified operations, and incorporate their results into its response. This enables more context-aware assistance without needing to manually copy-paste file contents or repeat previous information.
Custom Tools
chat.nvim supports both synchronous and asynchronous custom tools. Users can create lua/chat/tools/<tool_name>.lua file in their Neovim runtime path.
This module should provide at least two functions: scheme() and <tool_name> function. The scheme() function returns a table describing the tool's schema (name, description, parameters). The <tool_name> function is the actual implementation that will be called when the tool is invoked.
Synchronous Tool: Returns { content = "..." } or { error = "..." } directly.
Asynchronous Tool: Returns { jobid = <number> } and calls ctx.callback({ content = "..." }) when done.
Synchronous Tool Example
Here is an example for a synchronous get_weather tool:
local M = {}

---@param action { city: string, unit?: string }
function M.get_weather(action)
  if not action.city or action.city == '' then
    return { error = 'City name is required for weather information.' }
  end

  -- ... synchronous implementation ...

  return { content = 'Weather in ...' }
end

function M.scheme()
  return {
    type = 'function',
    ['function'] = {
      name = 'get_weather',
      description = 'Get weather information for a specific city.',
      parameters = { ... },
    },
  }
end

return M
Asynchronous Tool Example
For long-running operations, you can create asynchronous tools using job.nvim:
local M = {}
local job = require('job')

---@param action { url: string }
---@param ctx { cwd: string, session: string, callback: function }
function M.fetch_data(action, ctx)
  if not action.url or action.url == '' then
    return { error = 'URL is required.' }
  end

  local stdout = {}
  local stderr = {}

  local jobid = job.start({
    'curl',
    '-s',
    action.url,
  }, {
    on_stdout = function(_, data)
      for _, v in ipairs(data) do
        table.insert(stdout, v)
      end
    end,
    on_stderr = function(_, data)
      for _, v in ipairs(data) do
        table.insert(stderr, v)
      end
    end,
    on_exit = function(id, code, signal)
      if code == 0 and signal == 0 then
        -- Call the callback with the result
        ctx.callback({
          content = table.concat(stdout, '\n'),
          jobid = id,
        })
      else
        ctx.callback({
          error = 'Failed to fetch data: ' .. table.concat(stderr, '\n'),
          jobid = id,
        })
      end
    end,
  })

  -- Return jobid to indicate async execution
  if jobid > 0 then
    return { jobid = jobid }
  else
    return { error = 'Failed to start job' }
  end
end

function M.scheme()
  return {
    type = 'function',
    ['function'] = {
      name = 'fetch_data',
      description = 'Fetch data from a URL asynchronously.',
      parameters = {
        type = 'object',
        properties = {
          url = {
            type = 'string',
            description = 'URL to fetch data from',
          },
        },
        required = { 'url' },
      },
    },
  }
end

return M
Key Points for Asynchronous Tools:
- Accept a second
ctxparameter containing{ cwd, session, callback } - Return
{ jobid = <number> }when starting async operation - Call
ctx.callback({ content = "..." })orctx.callback({ error = "..." })when done - The callback must include
jobidin the result to match the async tracking - chat.nvim will wait for all async tools to complete before sending results to AI
🌐 HTTP API
chat.nvim includes a built-in HTTP server that allows external applications to send messages to your chat sessions. This enables integration with other tools, scripts, and automation workflows.
Enabling the HTTP Server
The HTTP server is automatically started when the http.api_key configuration is set to a non-empty value:
require('chat').setup({
  -- ... other configuration
  http = {
    host = '127.0.0.1',    -- Default: '127.0.0.1'
    port = 7777,           -- Default: 7777
    api_key = 'your-secret-key', -- Required to enable server
  },
})
API Endpoints
chat.nvim provides the following HTTP API endpoints for external integration:
| Endpoint | Method | Description |
|---|---|---|
/ |
POST | Send messages to a specified chat session |
/sessions |
GET | Get a list of all active session IDs |
/session |
GET | Get HTML preview of a session (requires id parameter) |
Base URL: http://{host}:{port}/ where {host} and {port} are configured in your chat.nvim settings (default: 127.0.0.1:7777)
Authentication: All requests require the X-API-Key header containing your configured API key.
Example Usage:
# Send message to session
curl -X POST http://127.0.0.1:7777/ \
  -H "X-API-Key: your-secret-key" \
  -H "Content-Type: application/json" \
  -d '{"session": "my-session", "content": "Hello from curl!"}'

# Get session list
curl -H "X-API-Key: your-secret-key" http://127.0.0.1:7777/sessions
For detailed request/response formats and examples, see the sections below.
Request Format
{
  "session": "session-id",
  "content": "Message content from external application"
}
Parameters:
| Parameter | Type | Description |
|---|---|---|
session |
string | Chat session ID. |
content |
string | Message content to send to the chat session |
Response Format
POST /
- Success: HTTP 204 No Content
- Authentication Error: HTTP 401 Unauthorized (invalid or missing API key)
- Validation Error: HTTP 400 Bad Request (invalid JSON or missing required fields)
- Method/Path Error: HTTP 404 Not Found (wrong method or path)
GET /sessions
- Success: HTTP 200 OK, returns a JSON array of session IDs
[ "2024-01-15-10-30-00", "2024-01-15-11-45-00", "2024-01-16-09-20-00" ] # Example output: array of session ID strings - Authentication Error: HTTP 401 Unauthorized (invalid or missing API key)
- Method/Path Error: HTTP 404 Not Found (wrong method or path)
Note: Session IDs follow the format YYYY-MM-DD-HH-MM-SS (e.g., 2024-01-15-10-30-00) and are automatically generated when new sessions are created.
GET /session
Returns an HTML preview of the specified chat session.
Request Parameters:
| Parameter | Type | Description |
|---|---|---|
id |
string | Required. Session ID to preview |
Example Request:
curl "http://127.0.0.1:7777/session?id=2024-01-15-10-30-00" \
  -H "X-API-Key: your-secret-key"
Response:
- Success: HTTP 200 OK, returns HTML content with
Content-Type: text/html; charset=utf-8 - Missing ID: HTTP 400 Bad Request
- Session Not Found: HTTP 404 Not Found
- Authentication Error: HTTP 401 Unauthorized
HTML Preview Features:
- Clean, modern dark theme design
- Session metadata display (ID, provider, model, working directory, system prompt)
- Message formatting with role badges and timestamps
- Support for tool calls and results visualization
- Reasoning content (thinking) display
- Error messages highlighting
- Token usage statistics
- Responsive layout with scrollable sections
Integration:
The HTML preview can be opened via:
:Chat previewcommand in Neovim<C-o>key binding in picker's chat source- Direct HTTP request to
/session?id=<session_id>endpoint
Message Queue System
Incoming messages are processed through a queue system:
- Messages are immediately queued upon receipt
- The queue is checked every 5 seconds
- Messages are delivered to the chat session when it's not in progress
- If a session is busy (processing another request), messages remain in the queue until the session becomes available
Usage Examples
Using curl:
# Send a message to a session
curl -X POST http://127.0.0.1:7777/ \
  -H "X-API-Key: your-secret-key" \
  -H "Content-Type: application/json" \
  -d '{"session": "my-session", "content": "Hello from curl!"}'

# Get all session IDs
curl -H "X-API-Key: your-secret-key" http://127.0.0.1:7777/sessions
Using Python:
import requests

# Send a message to a session
url = "http://127.0.0.1:7777/"
headers = {
    "X-API-Key": "your-secret-key",
    "Content-Type": "application/json"
}
data = {
    "session": "python-script",
    "content": "Message from Python script"
}
response = requests.post(url, json=data, headers=headers)
print(f"Status: {response.status_code}")

# Get session list
sessions_response = requests.get("http://127.0.0.1:7777/sessions", headers=headers)
if sessions_response.status_code == 200:
    sessions = sessions_response.json()
    print(f"Active sessions: {sessions}")
Security Considerations
- API Key Protection: Keep your API key secure and never commit it to version control
- Network Security: By default, the server binds to localhost (127.0.0.1). Only allow external access if you have proper network security measures
- Input Validation: All incoming messages are validated for proper JSON format and required fields
- Rate Limiting: Consider implementing external rate limiting if needed for your use case
Integration Ideas
- CI/CD Pipelines: Send build notifications or deployment status to chat sessions
- Monitoring Systems: Forward alerts from monitoring tools
- Script Automation: Trigger chat interactions from shell scripts
- External Applications: Integrate with other desktop or web applications
- Session Management Tools: External scripts can periodically fetch active session lists for cleanup or backup
- Monitoring Dashboard: Display status and statistics of all active sessions
🔍 Picker Integration
chat.nvim provides built-in picker sources for seamless integration with picker.nvim. These sources allow you to quickly access and manage your chat sessions, providers, and models.
Note: The chat picker source displays all your active sessions, allowing quick switching between parallel conversations with different models.
Available Sources:
chat- Search through your chat history sessions- Uses the first message of each session as the search string
- Quickly resume previous conversations
- Supports filtering and session management
Keyboard Shortcuts in chat picker:
<CR>(Enter): Open selected session<C-d>: Delete selected session<C-o>: Open HTML preview in browser
chat_provider- Switch between different AI providers- Dynamically change between supported providers (DeepSeek, OpenAI, etc.)
- Real-time switching without restarting Neovim
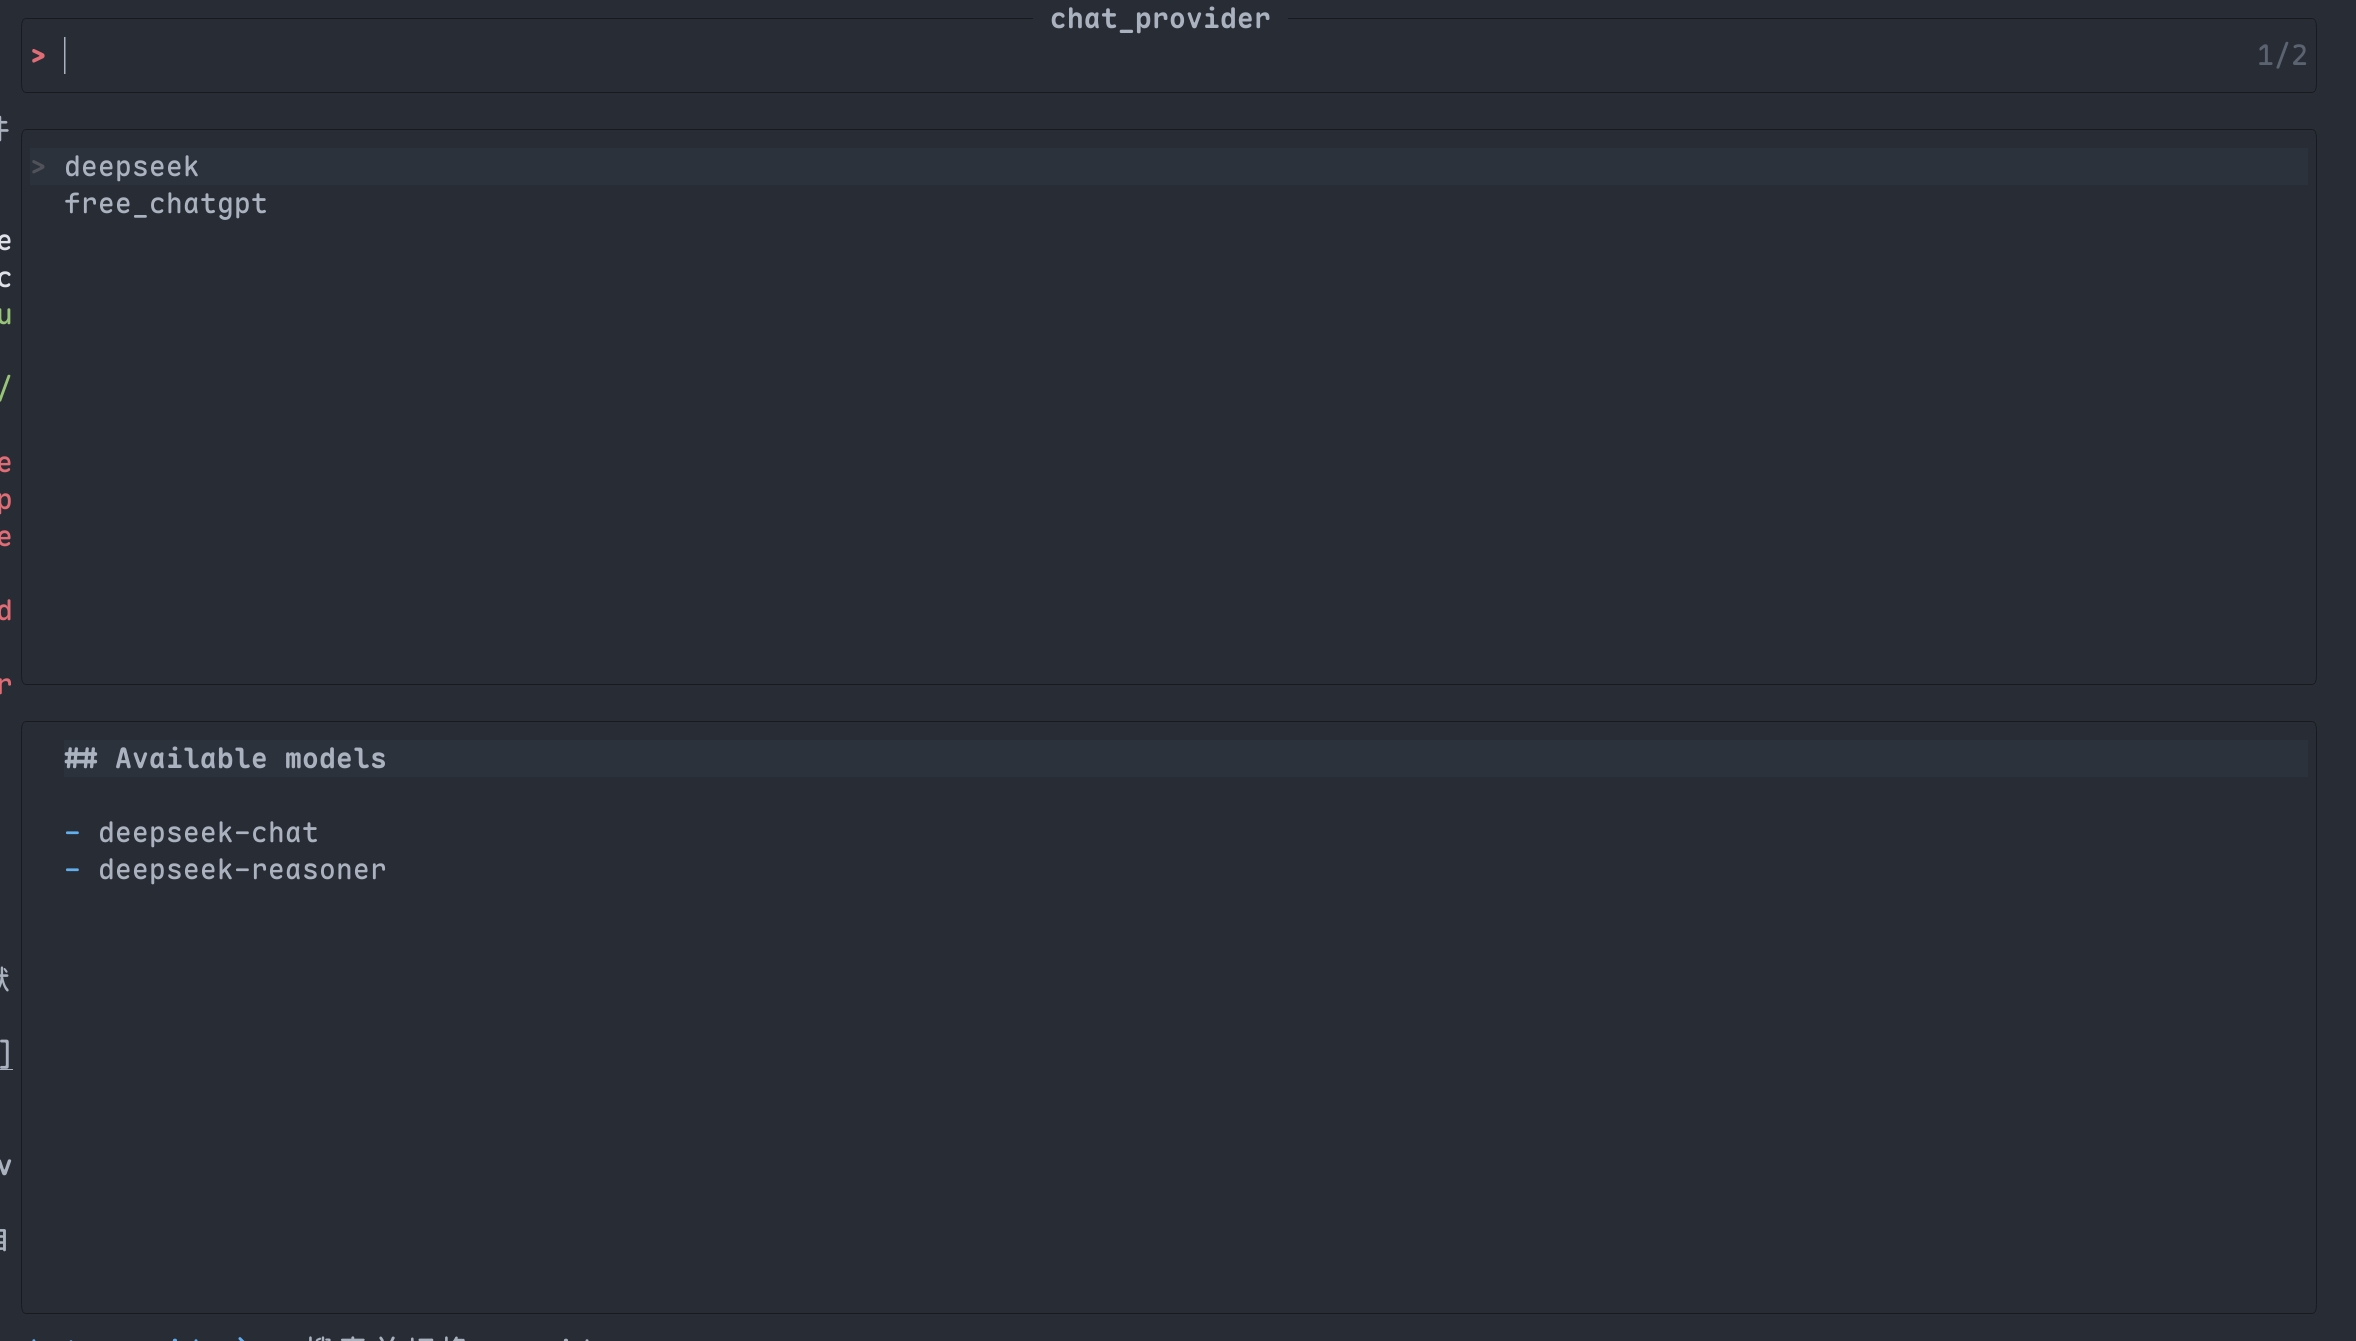
chat_model- Select available models for the current provider- Lists all compatible models for your selected provider
- Intelligent filtering based on provider capabilities

💬 IM Integration
chat.nvim supports integration with multiple instant messaging platforms for remote AI interaction.
Supported Platforms
| Platform | Icon | Bidirectional | Features |
|---|---|---|---|
| Discord | 💬 | ✅ Yes | Full-featured bot with session binding |
| Lark | 🐦 | ✅ Yes | Feishu/Lark bot with message polling |
| DingTalk | 📱 | ✅ Yes* | Webhook (one-way) or API (two-way) |
| WeCom | 💼 | ✅ Yes* | Enterprise WeChat webhook or API |
| Weixin | 💬 | ✅ Yes* | Personal WeChat via external API |
| Telegram | ✈️ | ✅ Yes | Bot API with group/private chat support |
*Webhook mode is one-way only; API mode supports bidirectional communication.
Discord
Discord integration allows you to interact with AI assistants via Discord messages.
Features
- Bidirectional Communication: Send messages from Discord to chat.nvim and receive responses
- Session Binding: Bind specific Discord channels to chat.nvim sessions
- Remote Control: Use Discord commands to manage sessions remotely
- Automatic Polling: Bot polls for new messages every 3 seconds
- Message Mentions: Bot responds to mentions and replies
Setup Guide
1. Create Discord Application
- Go to https://discord.com/developers/applications
- Click "New Application"
- Give it a name (e.g., "Chat.nvim Bot")
2. Create Bot User
- Navigate to "Bot" section
- Click "Add Bot"
- Copy the Token (this is your
integrations.discord.token)
3. Enable Message Content Intent
- Under "Privileged Gateway Intents"
- Enable "Message Content Intent" ✅
- Save changes
4. Get Channel ID
- Enable Developer Mode in Discord (User Settings → Advanced → Developer Mode)
- Right-click your channel → Copy ID (this is your
integrations.discord.channel_id)
5. Invite Bot to Server
- Go to "OAuth2" → "URL Generator"
- Select "bot" scope
- Required permissions: "Read Messages", "Send Messages", "Read Message History"
- Copy and open the generated URL
- Authorize the bot
6. Configure chat.nvim
integrations = {
  discord = {
    token = 'YOUR_DISCORD_BOT_TOKEN',
    channel_id = 'YOUR_CHANNEL_ID',
  },
}
Commands
Neovim Commands:
:Chat bridge discord- Bind current chat.nvim session to Discord channel
Discord Commands:
/session- Bind current Discord channel to active chat.nvim session/clear- Clear messages in the bound session
Workflow
- Configure Discord bot token and channel ID
- Open chat.nvim and create/start a session
- Run
:Chat bridge discordto bind the session - In Discord, type
/sessionto confirm binding - Mention the bot or reply to its messages to interact
- AI response will be sent back to Discord automatically
Technical Details
- API: Discord REST API v10
- Polling: 3-second intervals
- Message Limit: Auto-chunking for messages > 2000 characters
- State Persistence:
stdpath('data')/chat-discord-state.json - Timeout Protection: 5-second request timeout
Troubleshooting
Bot not responding:
- Verify token and channel_id are correct
- Check bot has "Message Content Intent" enabled
- Ensure bot is invited with proper permissions
- Make sure you're mentioning the bot or replying to its messages
State issues:
- Clear state:
:lua require('chat.integrations.discord').clear_state()
Lark (Feishu)
Lark/Feishu integration for enterprise communication.
Features
- Bidirectional Communication: Send and receive messages via Lark bot
- Session Binding: Bind Lark chats to chat.nvim sessions
- Automatic Polling: Polls for new messages every 3 seconds
- Long Message Support: Handles messages up to 30,720 characters
Setup Guide
1. Create Lark App
- Go to https://open.feishu.cn/app
- Create a new custom app
- Copy App ID and App Secret
2. Configure Bot Permissions
Required permissions:
im:message.group_msg- Get all messages in groups (sensitive permission)im:message- Get and send messages in private chats and groups
Configuration steps:
- Go to your app → "Permissions & Scopes"
- Search for and enable the required permissions above
- For sensitive permissions, you may need to apply for approval
3. Get Chat ID
- Use Lark API or app to get your chat_id
- For group chats, use the group ID
4. Configure chat.nvim
integrations = {
  lark = {
    app_id = 'YOUR_APP_ID',
    app_secret = 'YOUR_APP_SECRET',
    chat_id = 'YOUR_CHAT_ID',
  },
}
Commands
:Chat bridge lark- Bind current session to Lark chat
Technical Details
- API: Lark Open API
- Authentication: Tenant Access Token (auto-refresh)
- Polling: 3-second intervals
- Message Limit: 30,720 characters
- State Persistence:
stdpath('data')/chat-lark-state.json
DingTalk
DingTalk integration with webhook or API mode.
Features
- Two Modes: Webhook (simple, one-way) or API (bidirectional)
- Message Queue: Sequential message processing
- Long Message Support: Auto-chunking for messages > 20,000 characters
Setup Guide
Webhook Mode (Simple, One-Way):
- Create a custom robot in DingTalk group
- Copy the webhook URL
- Configure:
integrations = {
  dingtalk = {
    webhook = 'https://oapi.dingtalk.com/robot/send?access_token=XXX',
  },
}
API Mode (Advanced, Bidirectional):
- Create an enterprise internal app
- Get AppKey and AppSecret
- Configure:
integrations = {
  dingtalk = {
    app_key = 'YOUR_APP_KEY',
    app_secret = 'YOUR_APP_SECRET',
    conversation_id = 'YOUR_CONVERSATION_ID',
    user_id = 'YOUR_USER_ID',
  },
}
Technical Details
- API: DingTalk Open Platform API
- Authentication: Access Token (auto-refresh)
- Message Limit: 20,000 characters
- State Persistence:
stdpath('data')/chat-dingtalk-state.json
WeCom (Enterprise WeChat)
WeCom integration with webhook or API mode.
Features
- Two Modes: Webhook (simple, one-way) or API (bidirectional)
- Corporate Integration: Full enterprise WeChat support
- Message Queue: Sequential processing
Setup Guide
Webhook Mode (Simple, One-Way):
- Add a webhook robot in WeCom group
- Copy the webhook key
- Configure:
integrations = {
  wecom = {
    webhook_key = 'YOUR_WEBHOOK_KEY',
  },
}
API Mode (Advanced, Bidirectional):
- Create an enterprise application
- Get CorpID, CorpSecret, and AgentID
- Configure:
integrations = {
  wecom = {
    corp_id = 'YOUR_CORP_ID',
    corp_secret = 'YOUR_CORP_SECRET',
    agent_id = 'YOUR_AGENT_ID',
    user_id = 'YOUR_USER_ID',
  },
}
Technical Details
- API: WeCom API
- Authentication: Access Token (auto-refresh)
- Message Limit: 2,048 characters
- State Persistence:
stdpath('data')/chat-wecom-state.json
Weixin (Personal WeChat)
Weixin integration for personal WeChat accounts via QR code login.
Features
- QR Code Login: Scan with WeChat to login
- Auto Credential Caching: Login credentials saved locally
- Auto Reconnect: Automatically reconnects on restart
- Long Message Support: Auto-chunking for messages > 2,048 characters
Setup Guide
1. First-Time Login
Run the following Lua command in Neovim:
:lua require('chat.integrations.weixin').login()
A QR code will be displayed in a floating window.
2. Scan QR Code
- Open WeChat on your phone
- Scan the QR code
- Confirm login on your phone
3. Done!
Login credentials are automatically saved to:
stdpath('data')/chat-weixin-state.json
Subsequent restarts will auto-connect using saved credentials.
Commands
| Command | Description |
|---|---|
:lua require('chat.integrations.weixin').login() |
Start QR code login |
:lua require('chat.integrations.weixin').logout() |
Logout and clear credentials |
:lua require('chat.integrations.weixin').get_state() |
Check connection status |
Technical Details
- API: OpenClaw WeChat Gateway
- Authentication: QR Code Login (auto-refresh)
- Message Limit: 2,048 characters (auto-chunking)
- State Persistence:
stdpath('data')/chat-weixin-state.json - Polling: Long-poll every 3 seconds
Telegram
Telegram bot integration with full feature support.
Features
- Full Bot API Support: Works in groups and private chats
- Markdown Support: Send formatted messages with Markdown
- Reply Support: Reply to specific messages
- Long Message Support: Auto-chunking for messages > 4,096 characters
- Bot Commands: Support for
/sessionand/clearcommands
Setup Guide
1. Create Telegram Bot
- Open Telegram and search for
@BotFather - Send
/newbotcommand - Follow instructions to create your bot
- Copy the Bot Token (format:
123456789:ABCdefGHIjklMNOpqrsTUVwxyz)
2. Get Chat ID
For Private Chat:
- Start a conversation with your bot
- Send a message to the bot
- Visit:
https://api.telegram.org/bot<YOUR_BOT_TOKEN>/getUpdates - Find the
"chat":{"id":value in the response
For Group Chat:
- Add bot to group
- Send a message mentioning the bot
- Visit the same URL to get the group chat ID
3. Configure chat.nvim
integrations = {
  telegram = {
    bot_token = 'YOUR_BOT_TOKEN',
    chat_id = 'YOUR_CHAT_ID',
  },
}
Commands
Neovim Commands:
:Chat bridge telegram- Bind current session to Telegram chat
Telegram Commands:
/session- Bind current Telegram chat to active session/clear- Clear messages in the bound session
Workflow
- Configure Telegram bot token and chat ID
- Open chat.nvim and create/start a session
- Run
:Chat bridge telegramto bind the session - In Telegram, send a message to the bot or mention it in a group
- AI response will be sent back to Telegram automatically
Technical Details
- API: Telegram Bot API
- Polling: 3-second intervals via getUpdates
- Message Format: Markdown support
- Message Limit: Auto-chunking for messages > 4,096 characters
- State Persistence:
stdpath('data')/chat-telegram-state.json - Bot Detection: Auto-fetches and caches bot username
Troubleshooting
Bot not responding:
- Verify bot token is correct
- Check if chat_id is correct (private chat or group)
- For groups, make sure bot has read permissions
- Try sending
/startto the bot first
State issues:
- Clear state:
:lua require('chat.integrations.telegram').clear_state()
Common Features
All IM integrations share these common features:
Commands:
:Chat bridge <platform>- Bind current session to platform/session- Check/update session binding/clear- Clear current session messages
Technical Details:
- Polling Interval: 3 seconds (configurable per platform)
- Message Queue: Sequential processing to prevent race conditions
- State Persistence: JSON files in
stdpath('data') - Auto-reconnect: Automatic recovery from network issues
- Timeout Protection: 5-second request timeout
Platform-Specific Notes
Discord:
- Requires "Message Content Intent" enabled
- Bot must be mentioned or replied to in group chats
- Private channels require direct messages
Lark:
- Requires app approval for production use
- Tenant access token is auto-refreshed
- Supports rich message types (text, cards, etc.)
DingTalk:
- Webhook mode is simplest but one-way only
- API mode requires enterprise app registration
- Stream mode recommended for bidirectional communication
WeCom:
- Webhook mode is simplest but one-way only
- API mode requires corporate approval
- Internal apps have more permissions
Telegram:
- Works in both private and group chats
- Groups require bot to be admin for some features
- Supports inline queries and callbacks
Contributing New Integrations
To add a new IM platform integration:
- Create
lua/chat/integrations/<platform>.lua - Implement required functions:
connect(callback)- Start listening for messagesdisconnect()- Stop listeningsend_message(content)- Send messagecurrent_session()- Get current session IDset_session(session)- Set current sessioncleanup()- Cleanup resources
- Update
lua/chat/integrations/init.lua - Add documentation to README
See lua/chat/integrations/discord.lua for reference implementation.
📣 Self-Promotion
Like this plugin? Star the repository on GitHub.
Love this plugin? Follow me on GitHub.
💬 Feedback
If you encounter any bugs or have suggestions, please file an issue in the issue tracker.
📄 License
This project is licensed under the GPL-3.0 License.